Set up your avatars
Avatars are the identities your desk acts as across platforms. Add them, track each one's stats and level, and price the work with the built-in earnings calculator.
Everything else in Gigdesk is about the work. Avatars are about who does the work. An avatar is one platform identity — your Instagram, your LinkedIn, your Substack — that your desk can act as. This chapter, the last in the freelancers guide, shows you how to add avatars, keep their statlines honest, climb the level ladder, and price the work with the Earnings Calculator.
What an avatar actually is
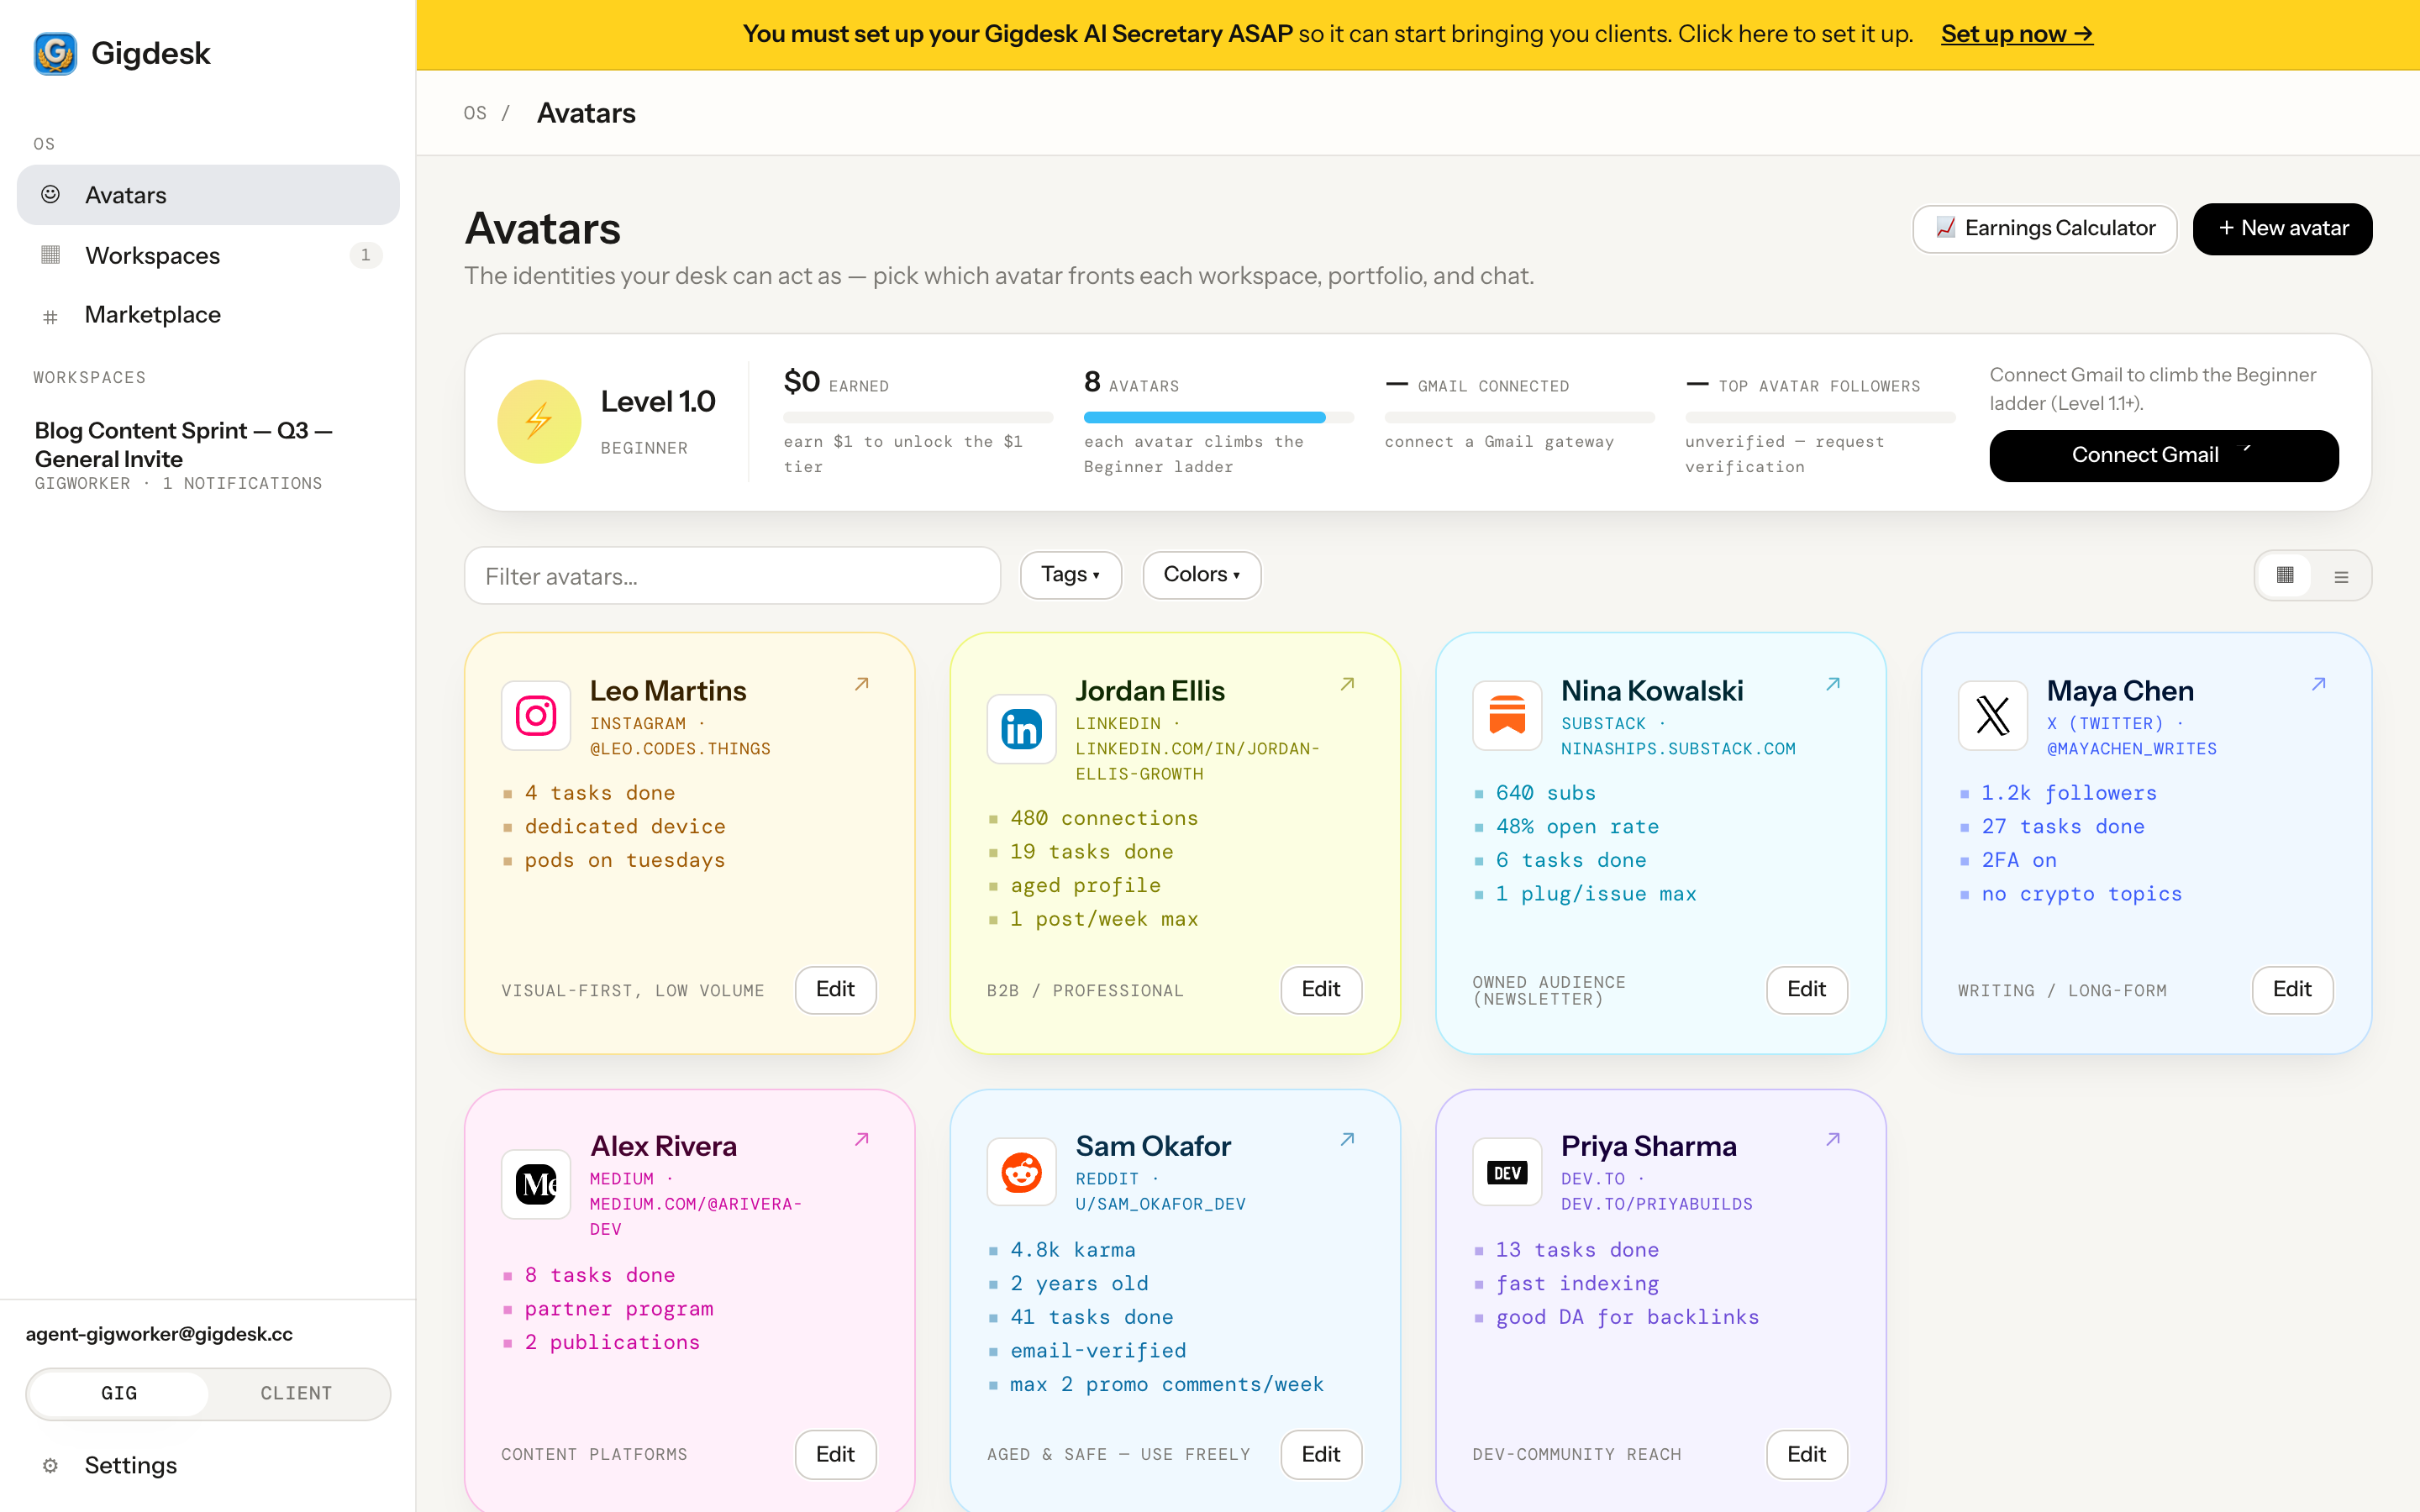
Open Avatars from the top of the sidebar in gig mode. It's the roster of identities your desk fronts — you pick which avatar represents each workspace, portfolio, and chat. Each card is one platform persona: Instagram, LinkedIn, Substack, X (Twitter), Reddit, Medium, Dev.to, YouTube, ProductHunt. Not email — email lives on the Email gateways page. An avatar is the public face; a gateway is the private inbox.
- Scannable statlines. Each card carries the numbers that matter for that platform — "4.8k karma", "480 connections", follower counts — so a client can size up the persona at a glance.
- A card color you own. Every avatar has an editable color, so your roster reads as a palette instead of a wall of text.
- A level that you earn. Avatars climb a level as you verify real stats and connect a Gmail gateway — the ladder rewards proof, not claims.
 Your level & earnings Price the work One platform identity
 Read the bar, climb the ladder
Across the top runs a level/earnings bar. It shows your current level (starting at Level 1.0 BEGINNER), how much you've $ EARNED, how many AVATARS you hold, whether GMAIL is CONNECTED, and your TOP AVATAR FOLLOWERS. A Connect Gmail to climb the ladder CTA sits right there — connecting a Gmail gateway is the fastest way to level up, because a real inbox behind the persona is what turns a claim into proof.
Step by step
- 1
Open Avatars & add one
From the sidebar top (gig mode), open Avatars and hit + New avatar. Pick the platform this persona lives on — Instagram, LinkedIn, Substack, X, Reddit, Medium, Dev.to, YouTube, or ProductHunt.
- 2
Fill in honest statlines
Enter the numbers that matter for that platform — followers, "4.8k karma", "480 connections". Keep them real; the whole point of the ladder is that verified stats outrank inflated ones.
- 3
Set the card color, then Edit anytime
Give the avatar a card color so your roster stays scannable. Every card has an Edit button — come back to update stats or recolor whenever the persona grows.
- 4
Connect Gmail to climb
Use the Connect Gmail to climb the ladder CTA in the bar. Backing the persona with a real inbox raises its level and unlocks the trust clients look for.
- 5
Price the work
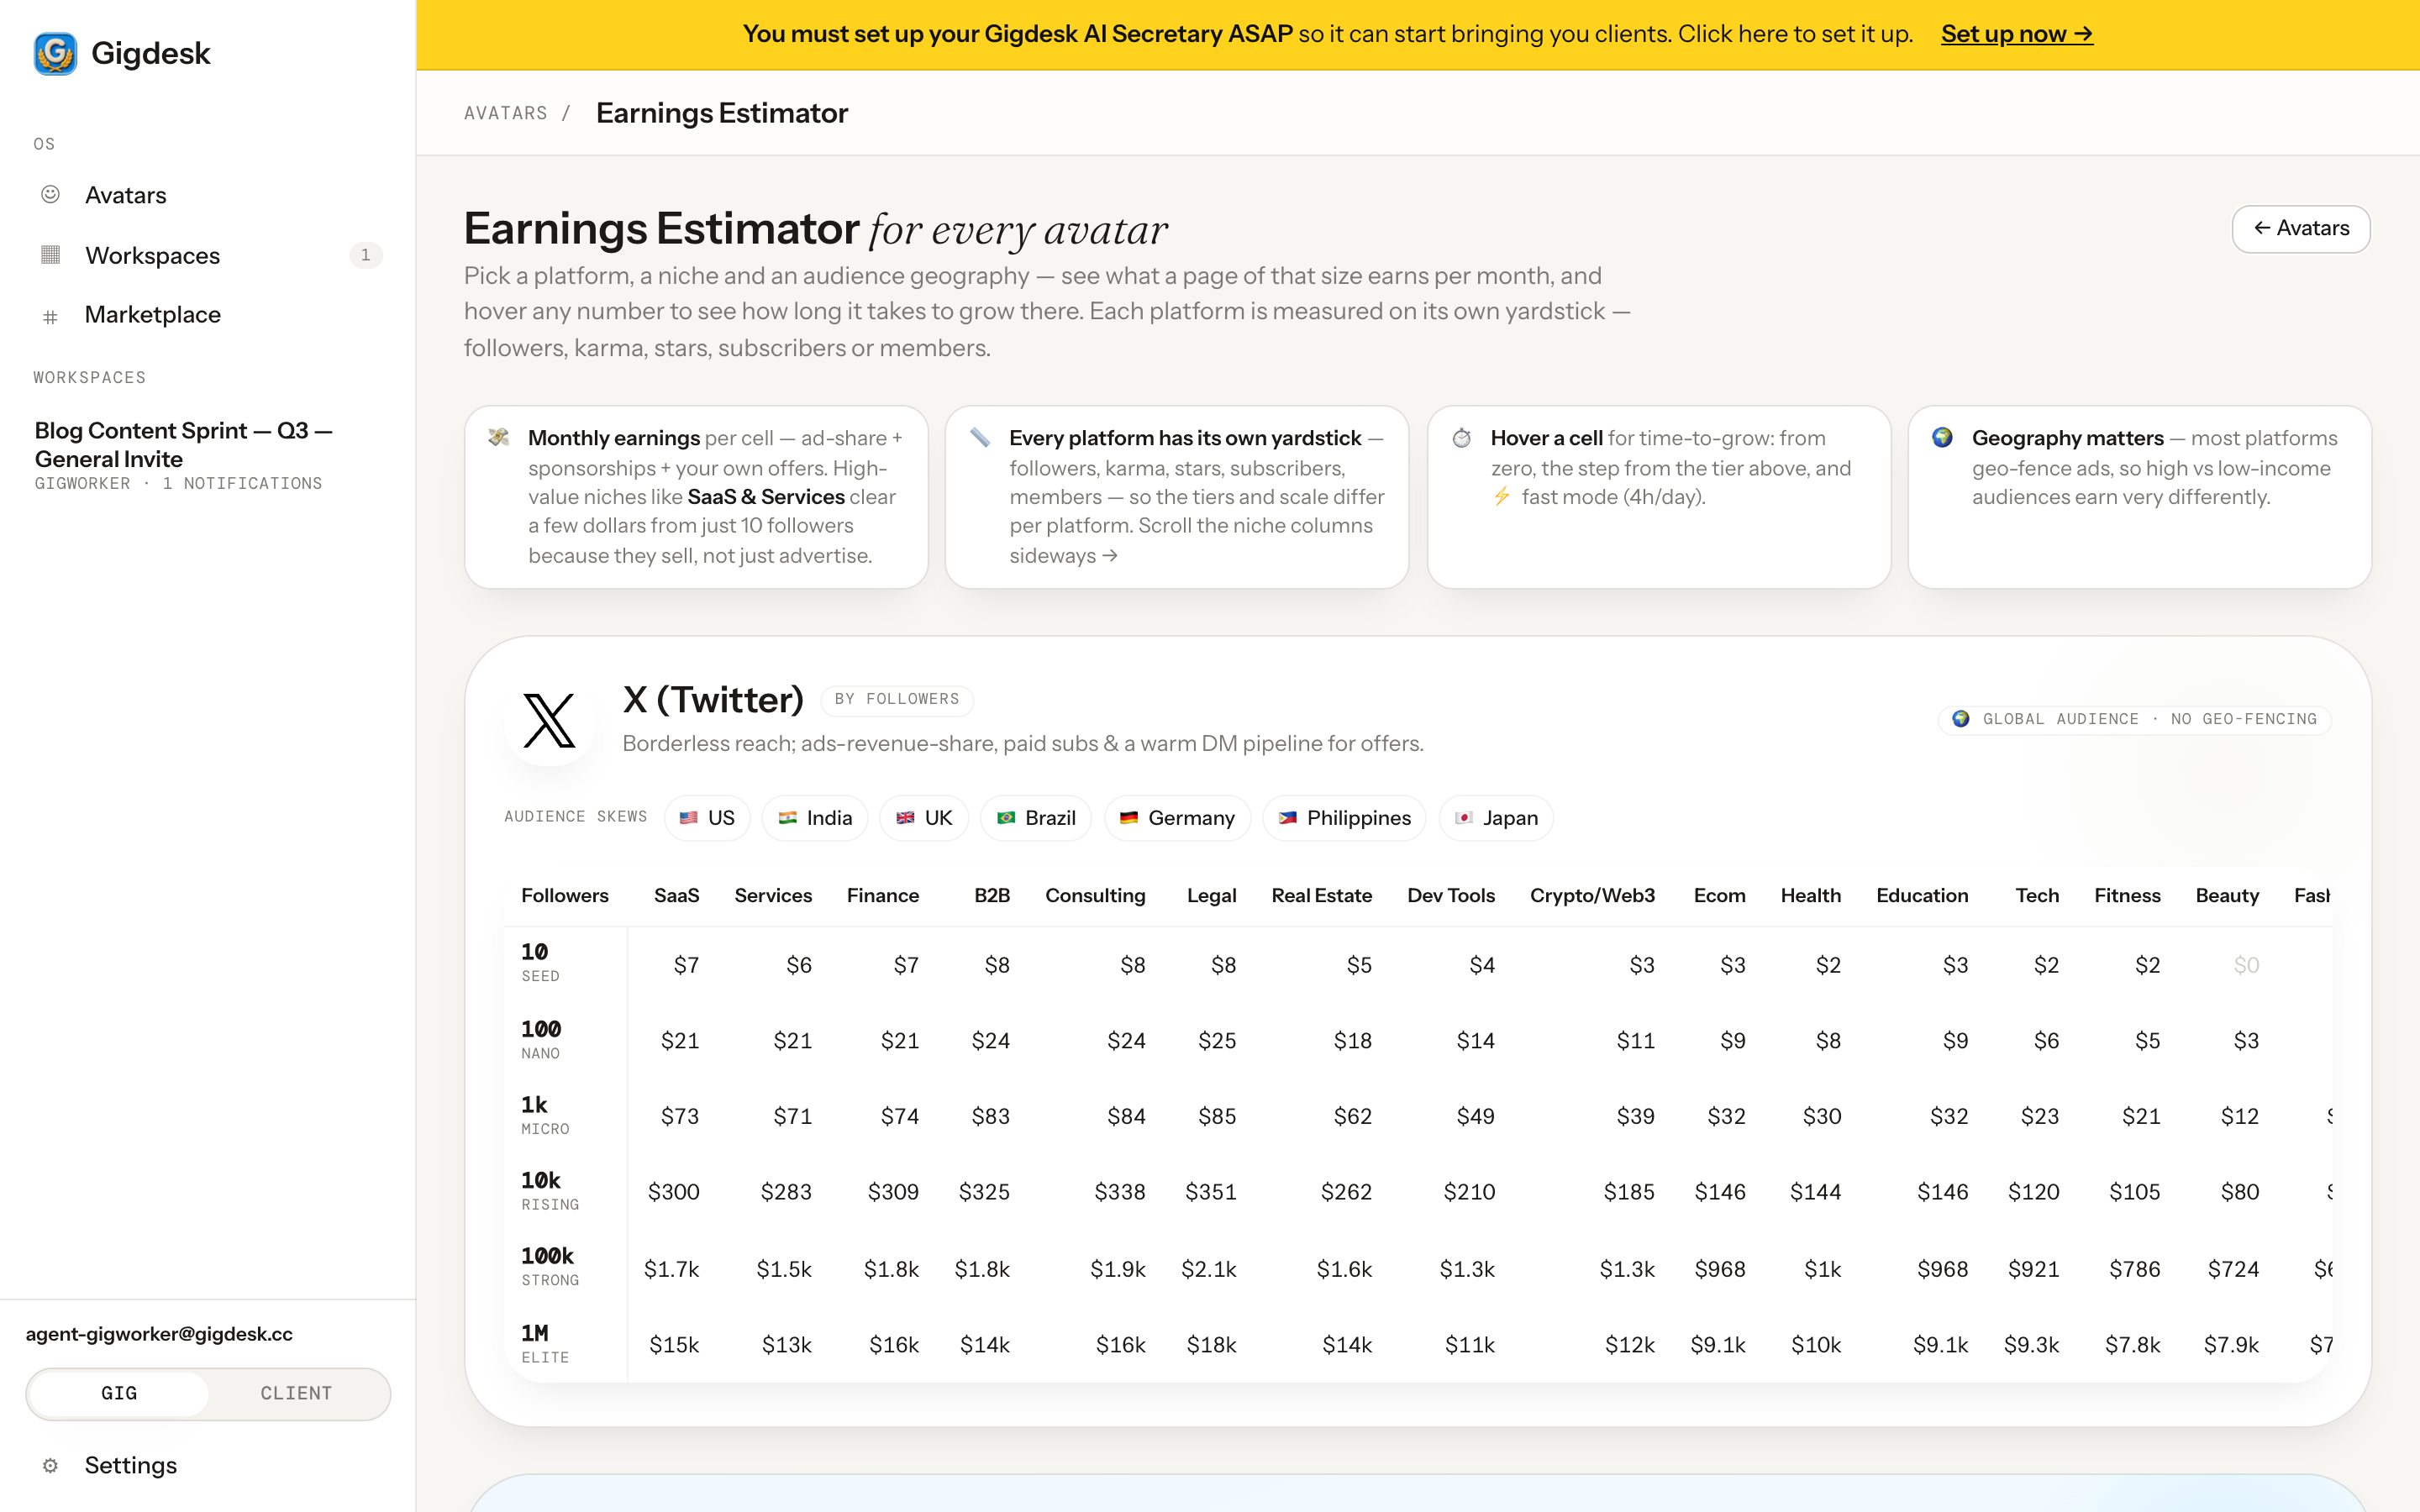
Open the Earnings Calculator to estimate what an account like yours earns per month across platforms and niches — so you quote task-queue prices with a number, not a guess.
Key takeaways
- An avatar is one platform identity (Instagram, LinkedIn, Substack, X, Reddit, Medium, Dev.to, YouTube, ProductHunt) that your desk fronts — you pick which one represents each workspace, portfolio, and chat.
- Add avatars with + New avatar, give each honest statlines and a card color, and Edit them as the persona grows; the level/earnings bar tracks your level, earnings, avatar count, Gmail, and top followers.
- Verify real stats and connect a Gmail gateway to climb the level ladder, and use the Earnings Calculator to price the work.
That's your desk. Now see the other side.
You've set up avatars, workspaces, chatbots, and your secretary. Next, flip the table — see exactly how a client builds a project, funds the task queues, and sends you the invite.
See it from the client side Request an invite