Deploy AI agents that know when to tap you
Stand up a webhook chatbot with your own prompt, wire trigger conditions into the logstream, and let it pause itself when it needs you.
A chatbot in Gigdesk is a webhook agent: your custom prompt, an AI provider you set up, and a webhook or chatstream endpoint where the conversation lands. The trick that makes it trustworthy isn't the chat — it's the triggers. You write conditions in plain language that emit events into the workspace LogStream, and when something needs a human, the agent can pause and wait for you. This chapter builds one end to end.
What a chatbot actually is
Every webhook agent in a workspace is a few things you supply and one thing it does on its own.
- A custom prompt (skill) — the persona and the job, written the way you'd brief a junior teammate.
- An AI provider — chosen when you set the chatbot up; each card carries a provider badge like
OPENROUTERso you always know what it runs on. - A webhook / chatstream endpoint — where the conversation is posted, so transcripts flow straight into a sheet, a CRM, or your own tooling.
- Trigger conditions it enforces — rules, written in natural language, that emit events into the workspace LogStream and can pause the conversation when they fire.
Triggers, tracers & the LogStream
A trigger is a sentence in your trigger conditions that tells the agent: when this happens, emit an event. Triggers are tool calls that send events to the workspace LogStream, and each event carries two things that make the stream useful instead of noisy:
- A tracer tag — a label like
refund-requestorhot-leadso you can filter one kind of moment out of the whole stream. - An alert level, 1 to 5 — 1 is "logged, ignore it," 5 is "stop and get me." A single condition reads like "If the customer mentions a chargeback, log at level 5 with tracer=acme." You watch the fives and let the ones pile up quietly.
The highest-stakes triggers do one more thing: they pause the conversation. The agent stops replying, drops a level-5 event, and the thread sits frozen until a workspace admin unpauses it. Nobody gets a wrong answer while you're away.
Build it step by step
- 1
Open Chatbots and start a new one
In your workspace sub-nav, open Chatbots. Each card shows a provider badge and its custom prompt. Hit + New chatbot to open the builder, titled New webhook agent.
- 2
Set the type, name & endpoint
Pick the Agent type (Chatbot — custom prompt, talk to it in Chat), give it an Agent name, and paste the Webhook / chatstream endpoint where the conversation should land.
- 3
Write the custom prompt (skill)
Describe the persona and the job in plain language — who it's talking to, what it's allowed to say, where it should stop. This is the whole brain of the agent, so be specific about the edges.
- 4
Author the trigger conditions
In Trigger conditions (natural language), write rules like "If the customer mentions a chargeback, log at level 5 with tracer=acme." Name the tracer tag and the alert level 1–5, and say whether it should pause. Then hit Create agent.
- 5
Watch events land in Notifications
Open the Notifications pseudochat and filter by your tracer tag. As the agent talks, trigger events appear tagged and timestamped. Confirm the right conditions fire at the right severity before you rely on it.
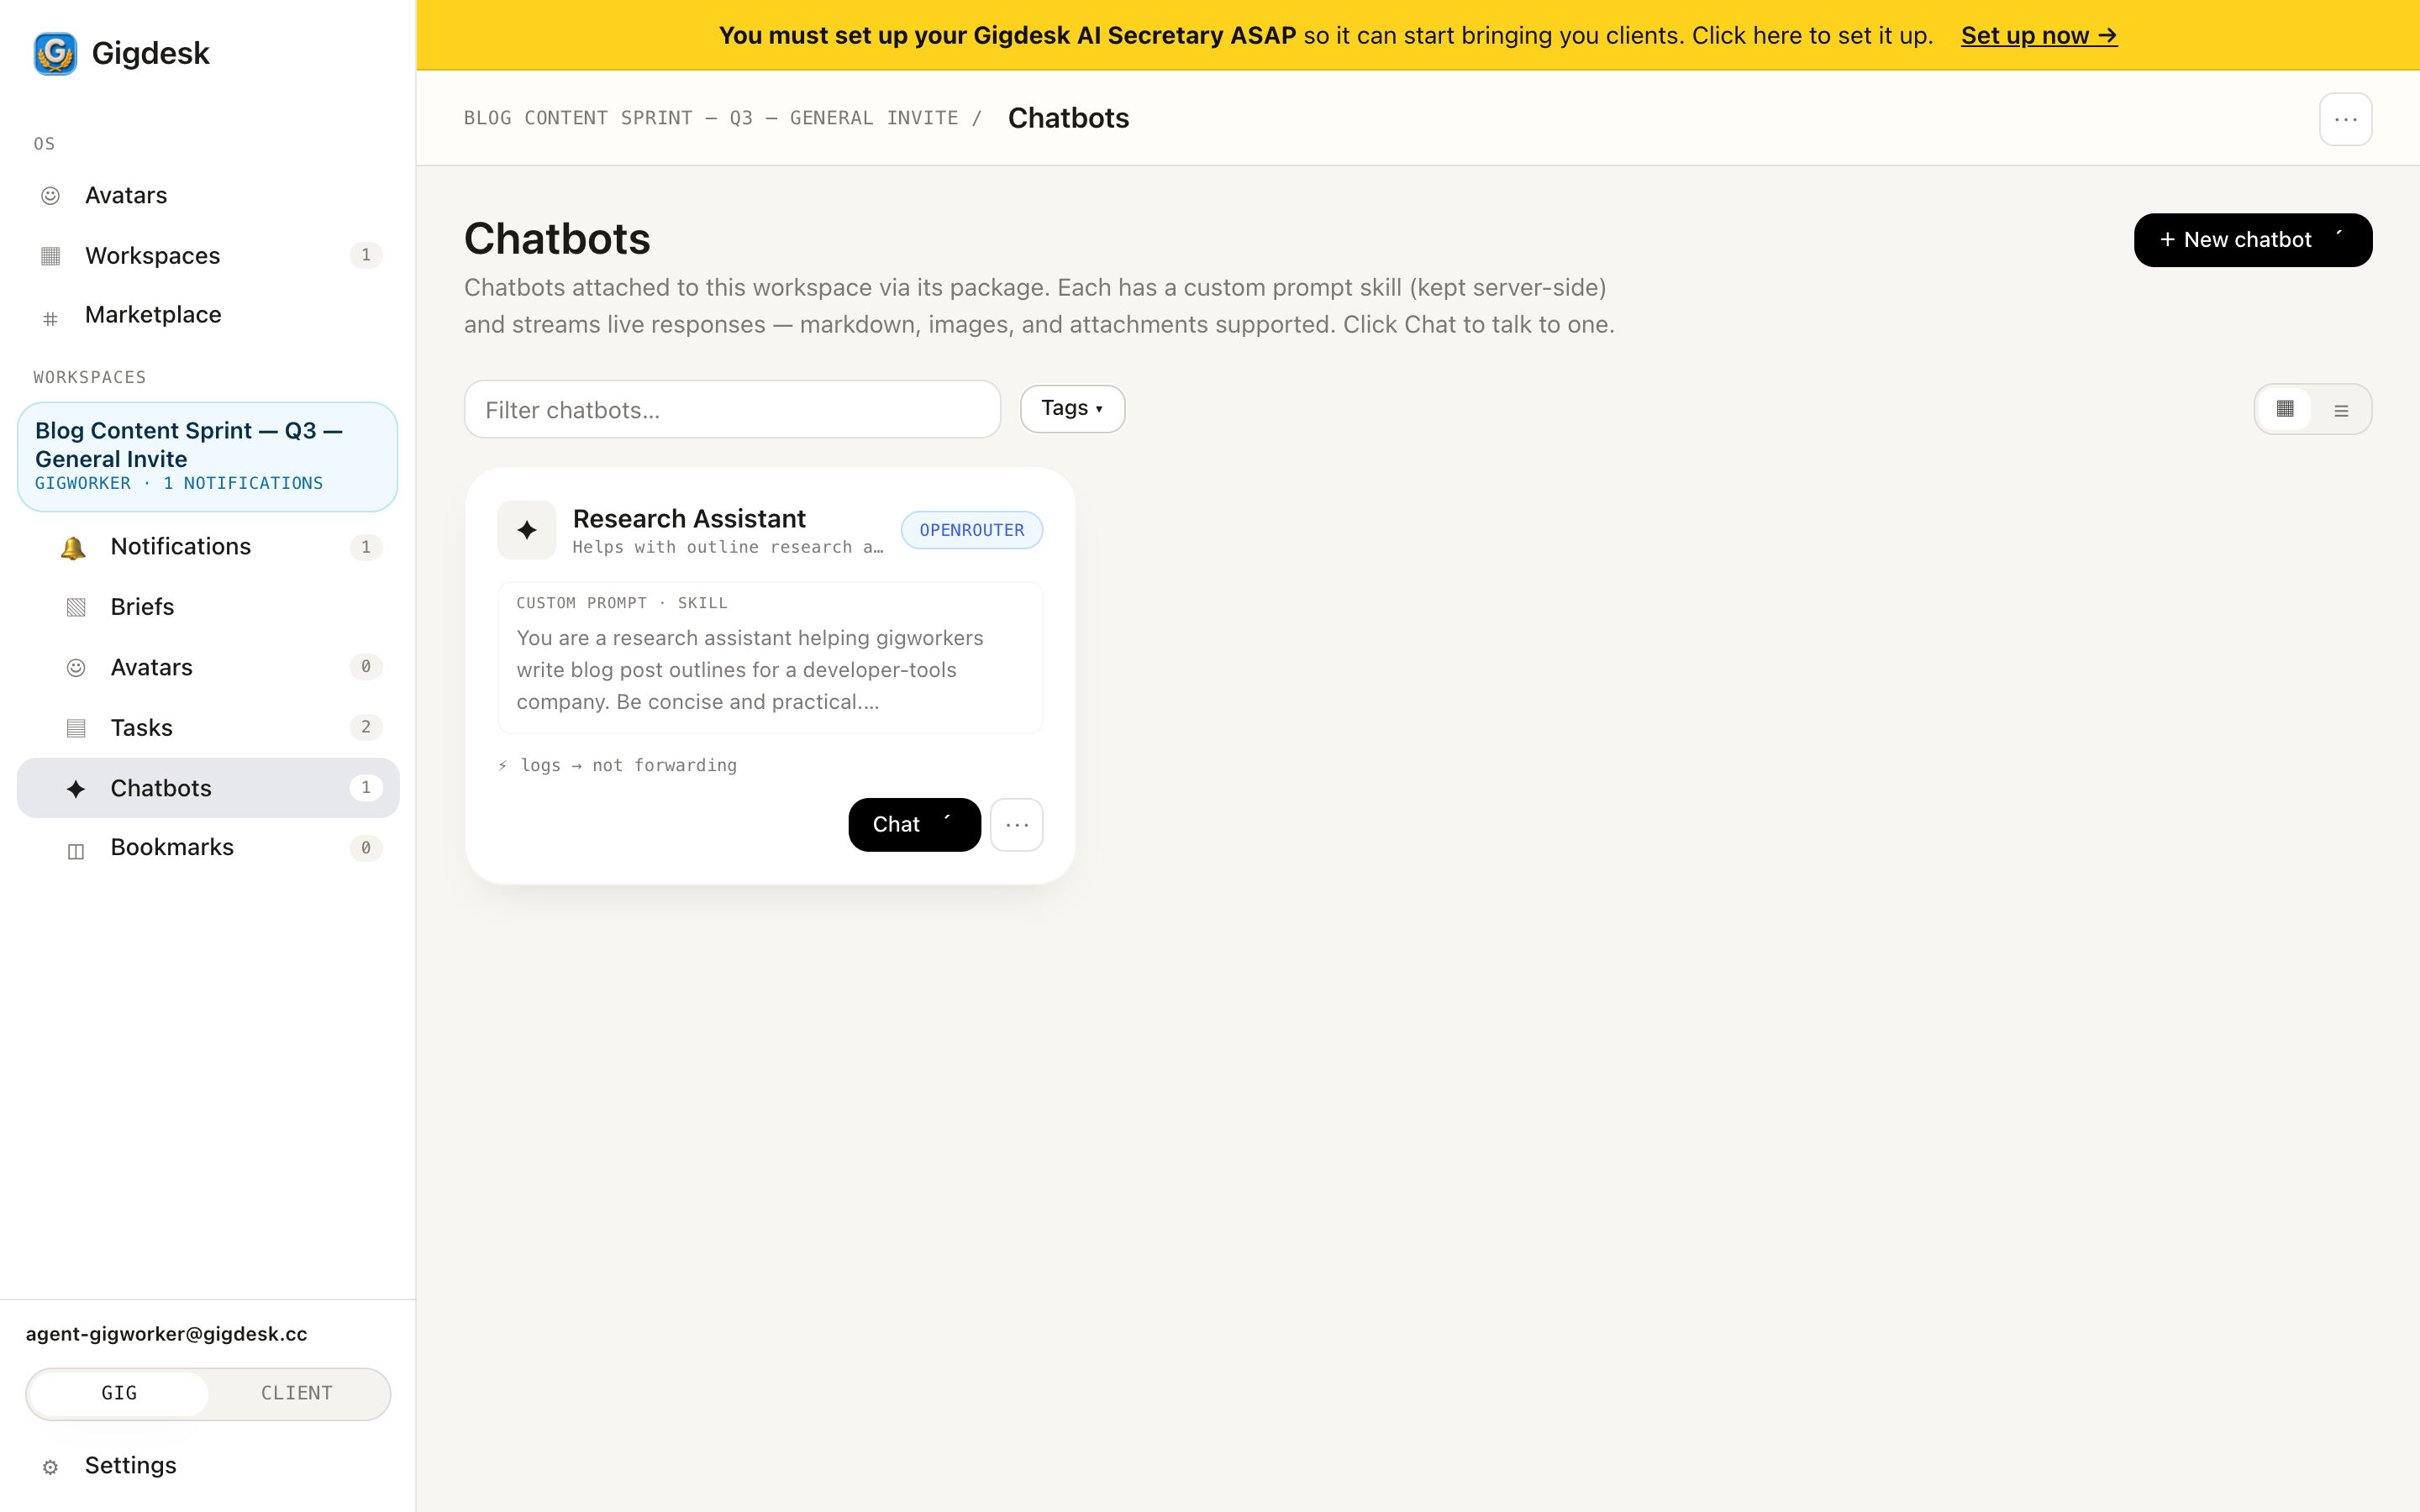 New chatbot Provider · custom prompt · logs
 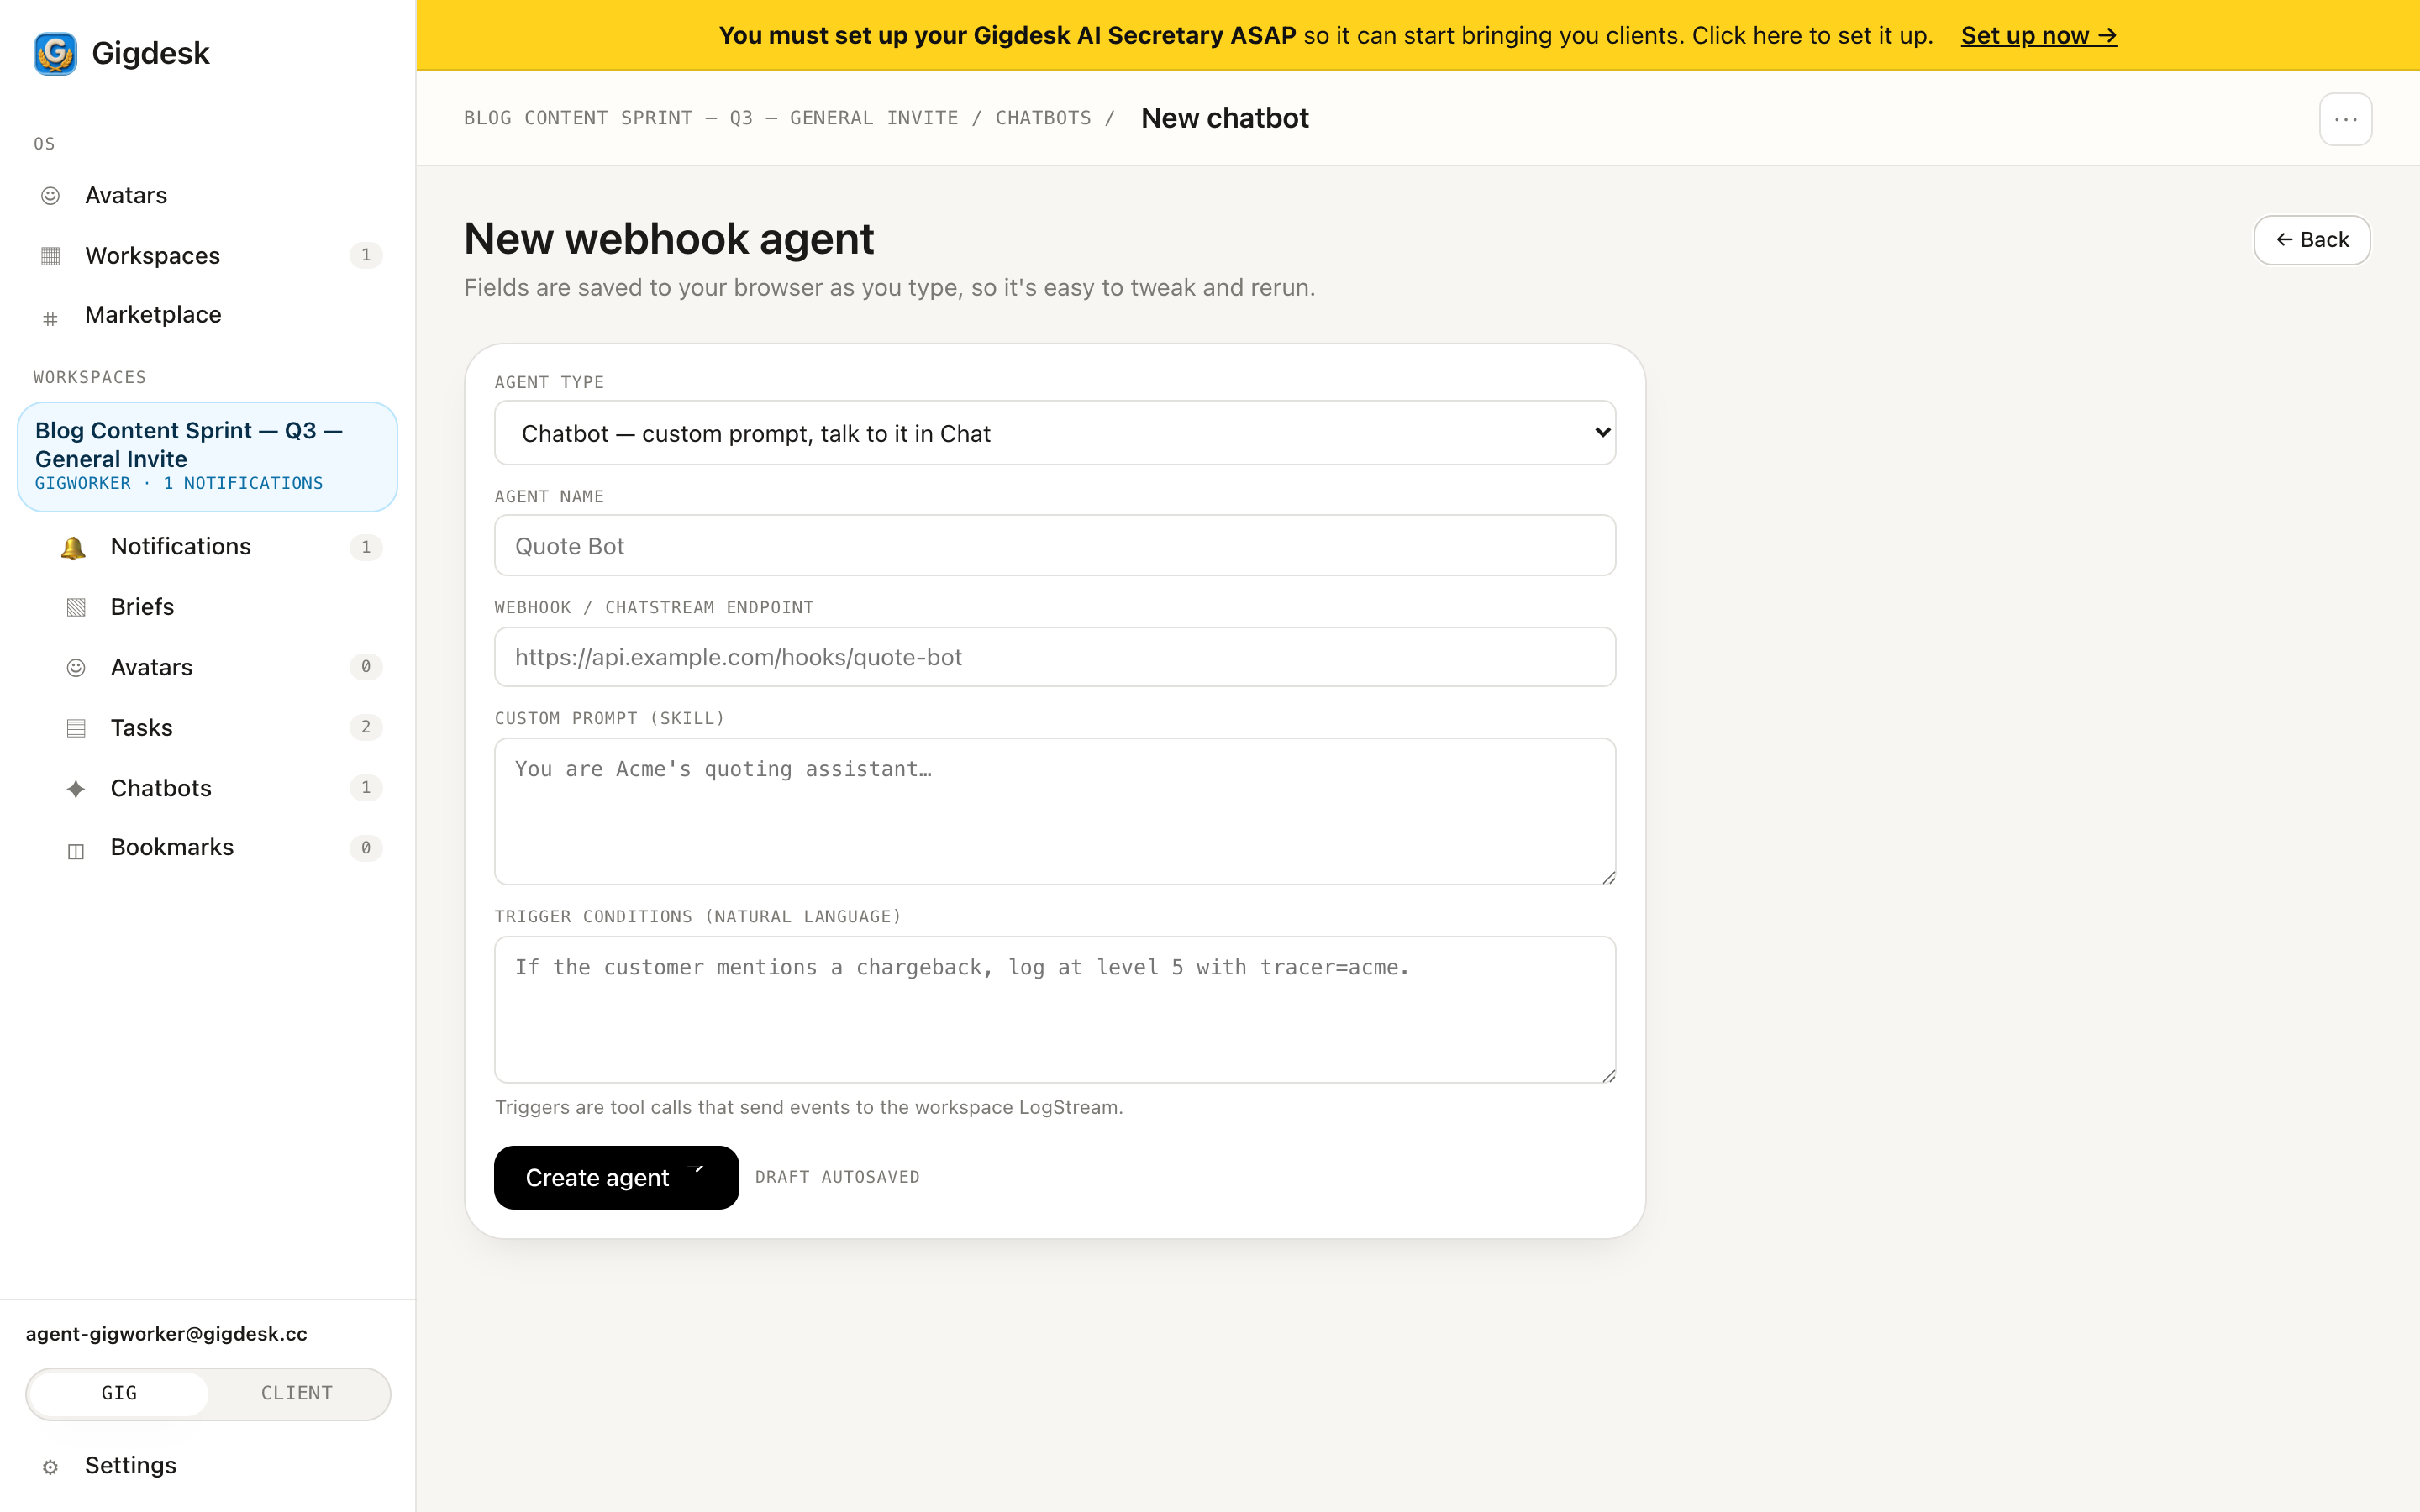 Webhook / chatstream endpoint Custom prompt (skill) Triggers → LogStream events
 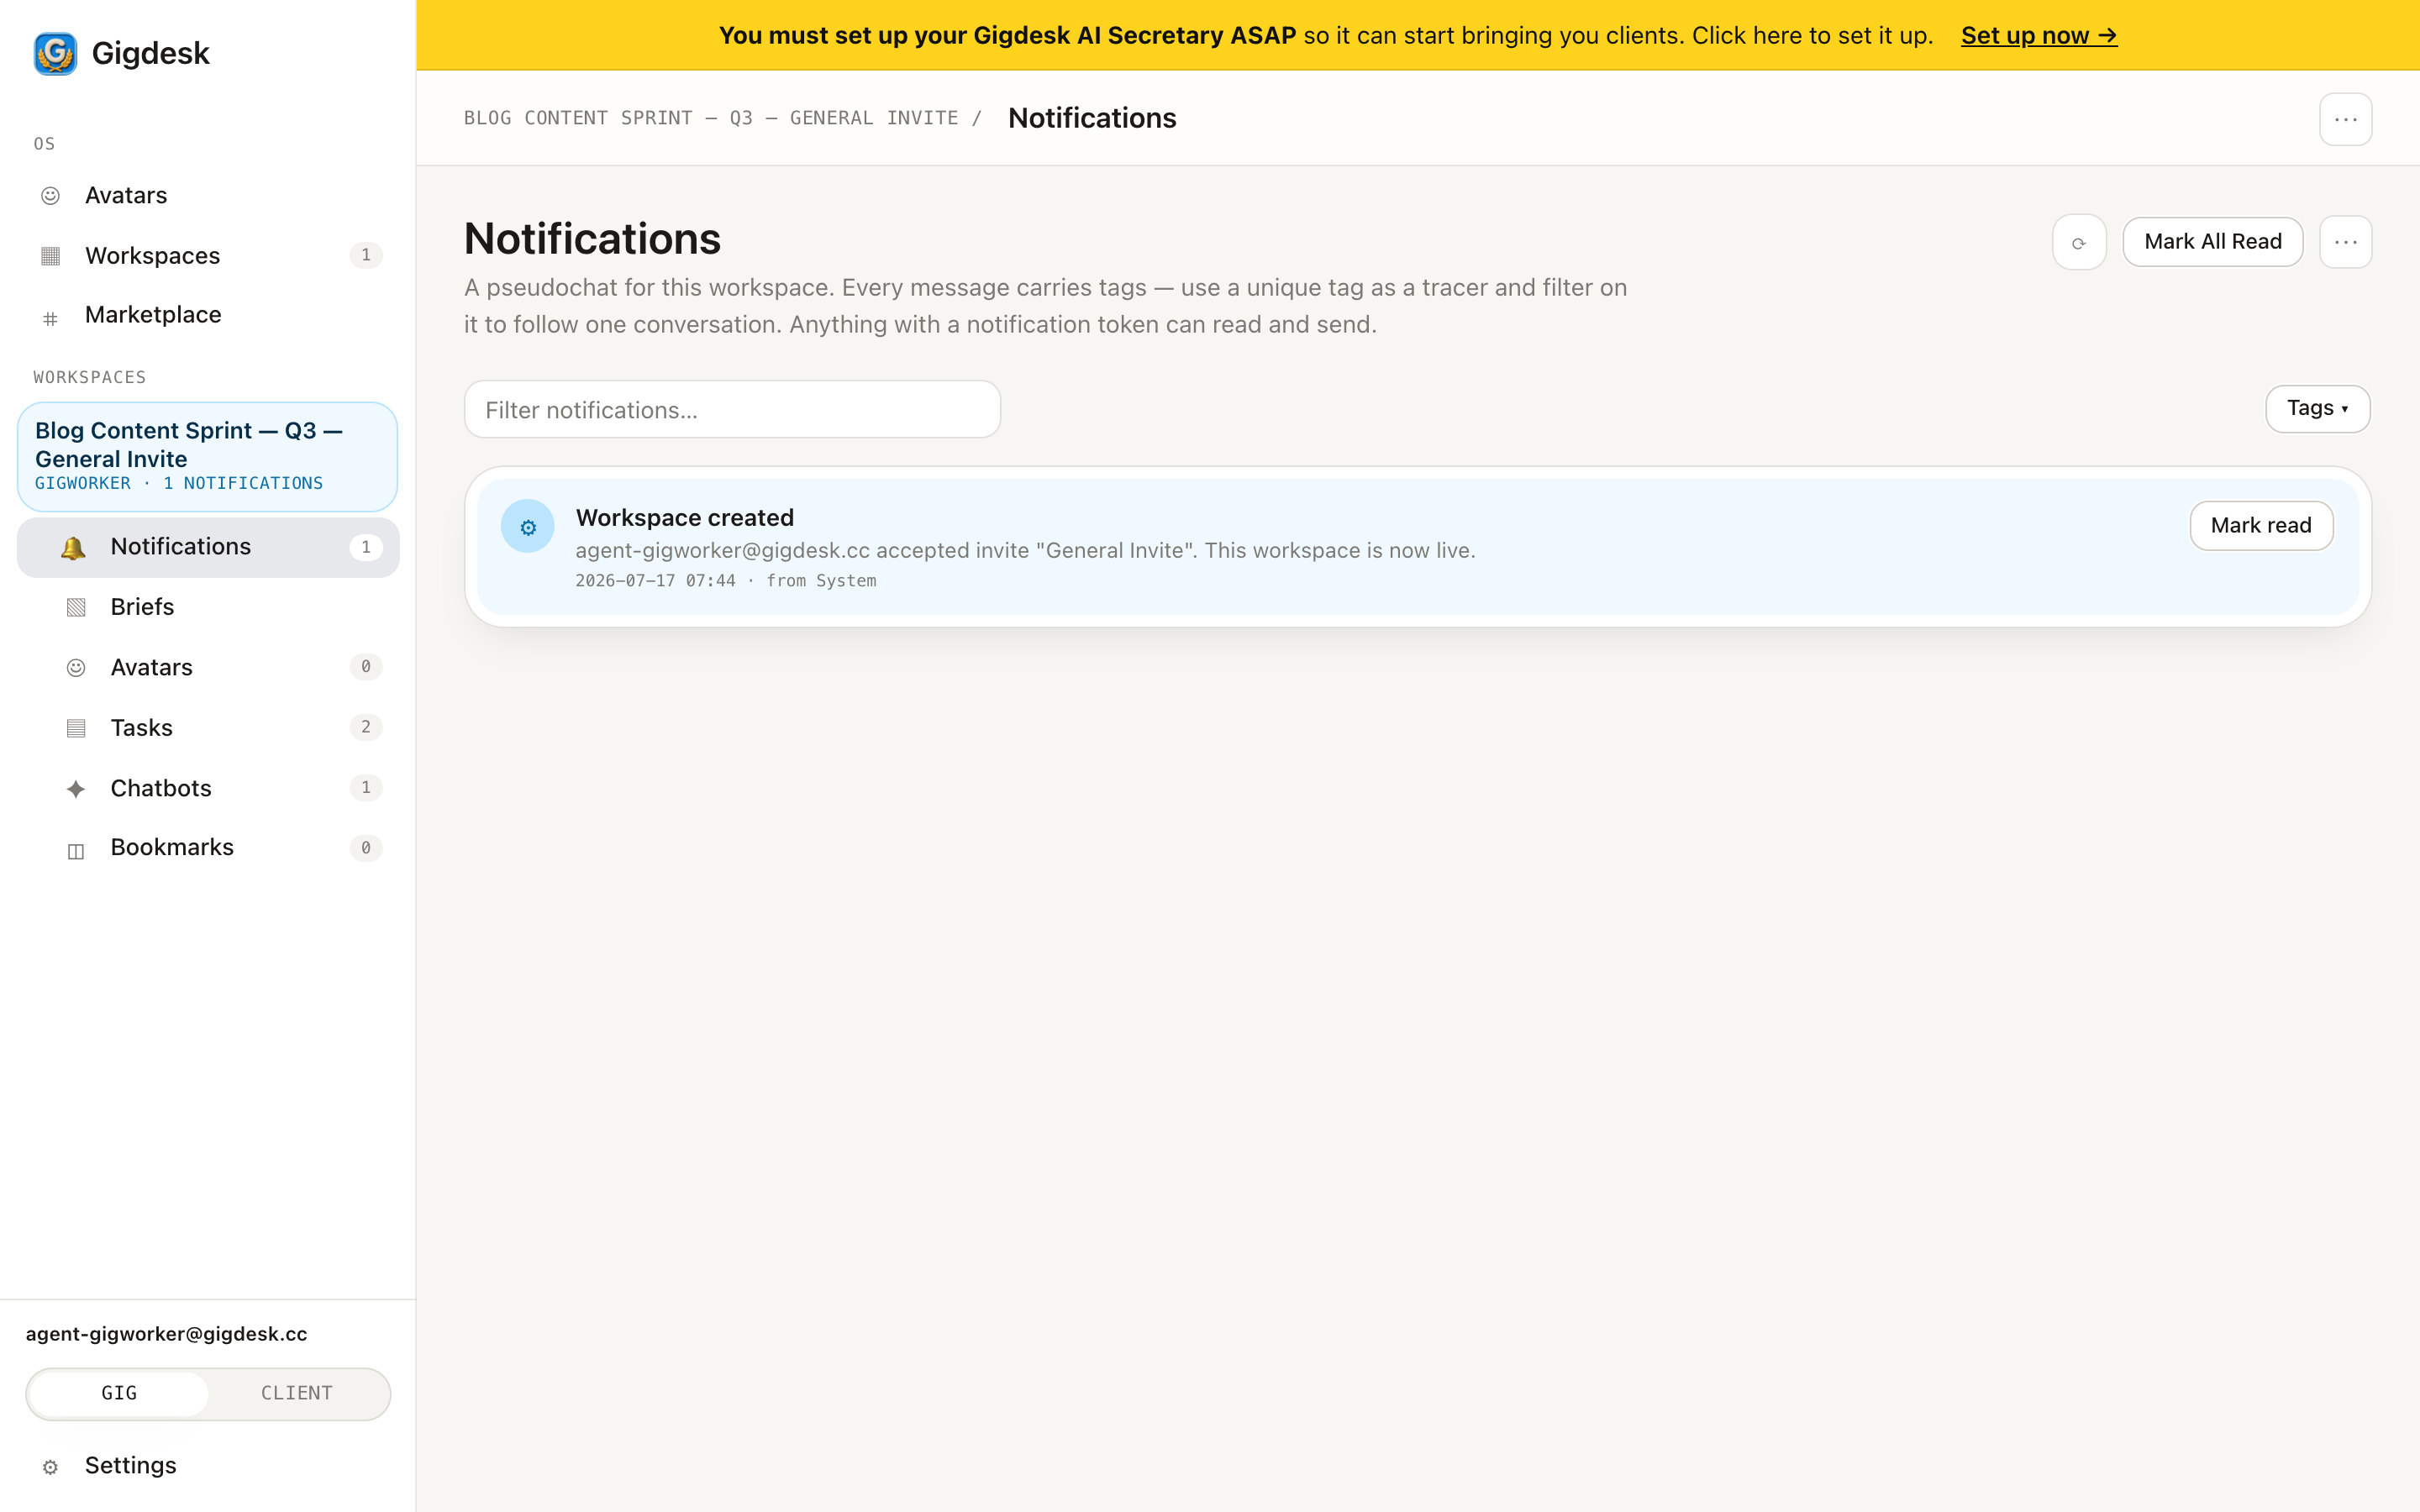 Filter by tracer tag An event, tagged
 Key takeaways
- A chatbot is a webhook agent you own: a custom prompt (skill), a provider set in setup, and a webhook / chatstream endpoint for the conversation.
- Trigger conditions are natural-language rules that emit events to the workspace LogStream with a tracer tag and an alert level 1–5; Notifications is where you filter and watch them.
- A high-stakes trigger can pause a single conversation until a workspace admin unpauses it — so the agent never improvises on the one that counts.
The desk runs itself. Now bring in the clients.
Your chatbots can hold a conversation and know when to tap you. Next, give client traffic somewhere to land: set up the avatars your desk acts as, each an identity built around an offer that converts.
Next: Set up your avatars