Invite a gigworker
Mint reusable labeled invites from a subset of your resources and send the link — accepting it spins up the gigworker's workspace.
You've built a project — a brief, task queues, chatbots, bookmarks. Now you need someone to work it. In Gigdesk you don't send one-off invites; you mint a labeled, reusable link from your project and share it. Anyone who opens it sees the package and joins with one click. This chapter shows you where invites live and how to hand one out.
How invites actually work
Inside a project (client mode), the sub-nav has a Members page with three tabs — MEMBERS, AVATARS, and INVITES. On the Invites tab you mint links. Each invite is reusable and labeled: it bundles a subset of the project's resources into a shareable URL, and the underlying Dollar Platoon gigs are open invite — whoever has the link can join.
- One link, many gigworkers. An invite isn't spent when someone accepts. The same "General Invite" link keeps working for everyone you share it with, and the card tracks how many times it's been accepted.
- It carries the package. Each invite summarizes what it includes — brief, task queues, chatbots, bookmarks — so a gigworker sees the whole job before committing.
Mint & share the link
- 1
Open Members → Invites
In your project's sidebar, open Members and switch to the INVITES tab. You'll see any invites you've already minted, each with its label and a share link.
- 2
Mint a new invite
Click + New invite. Give it a label (like "General Invite") and pick the subset of the project's resources it should include. Gigdesk mints a reusable, labeled link.
- 3
Check what it includes
Each invite card shows a summary — for example brief · 2 queues · 1 chatbots · 2 bookmarks · accepted 1× — so you can confirm the package is right before you hand it out.
- 4
Copy the link and send it
Hit Copy link and send it however you like — chat, email, DM. When the gigworker opens it, they land on a Project invite page and click Accept project, which spins up their workspace.
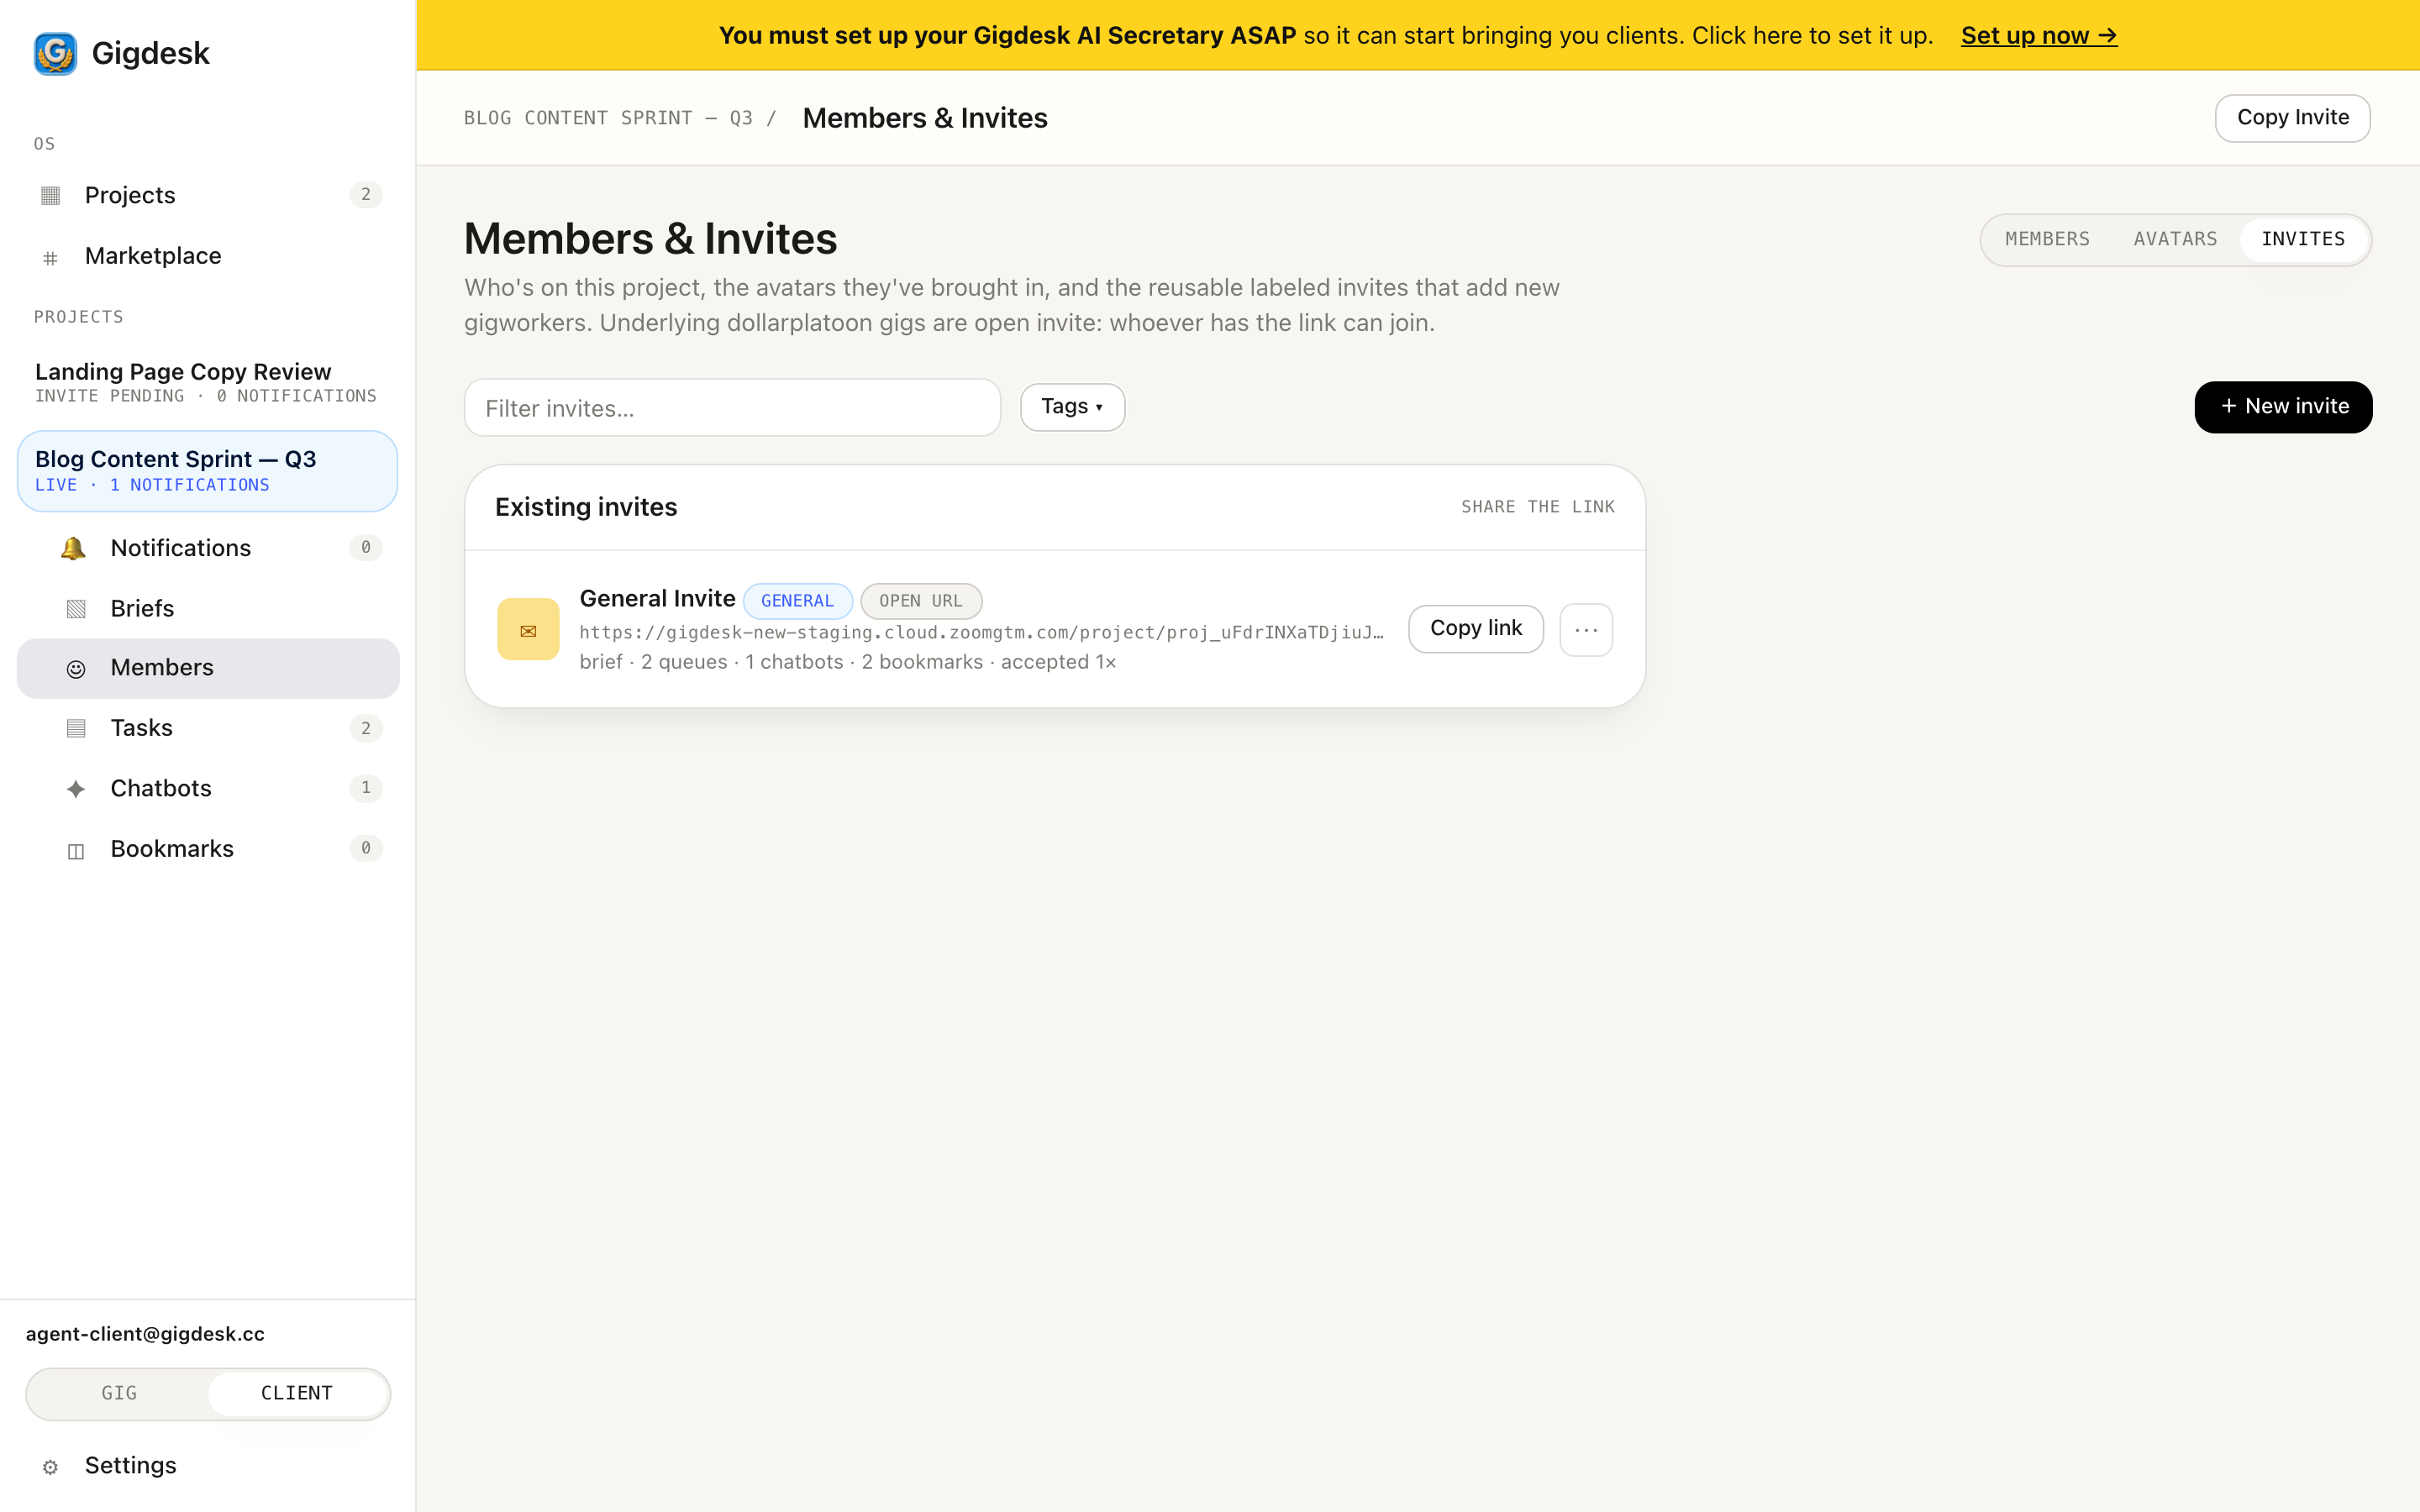 Mint a labeled invite What this invite includes Share the link
 On the other end, your link opens a Project invite page for the gigworker. It previews the package — task queues, chatbots, bookmarks, and a brief preview — and an Accept project button turns it into a live workspace with them as the gigworker. You never have to provision anything per person; the link does the work.
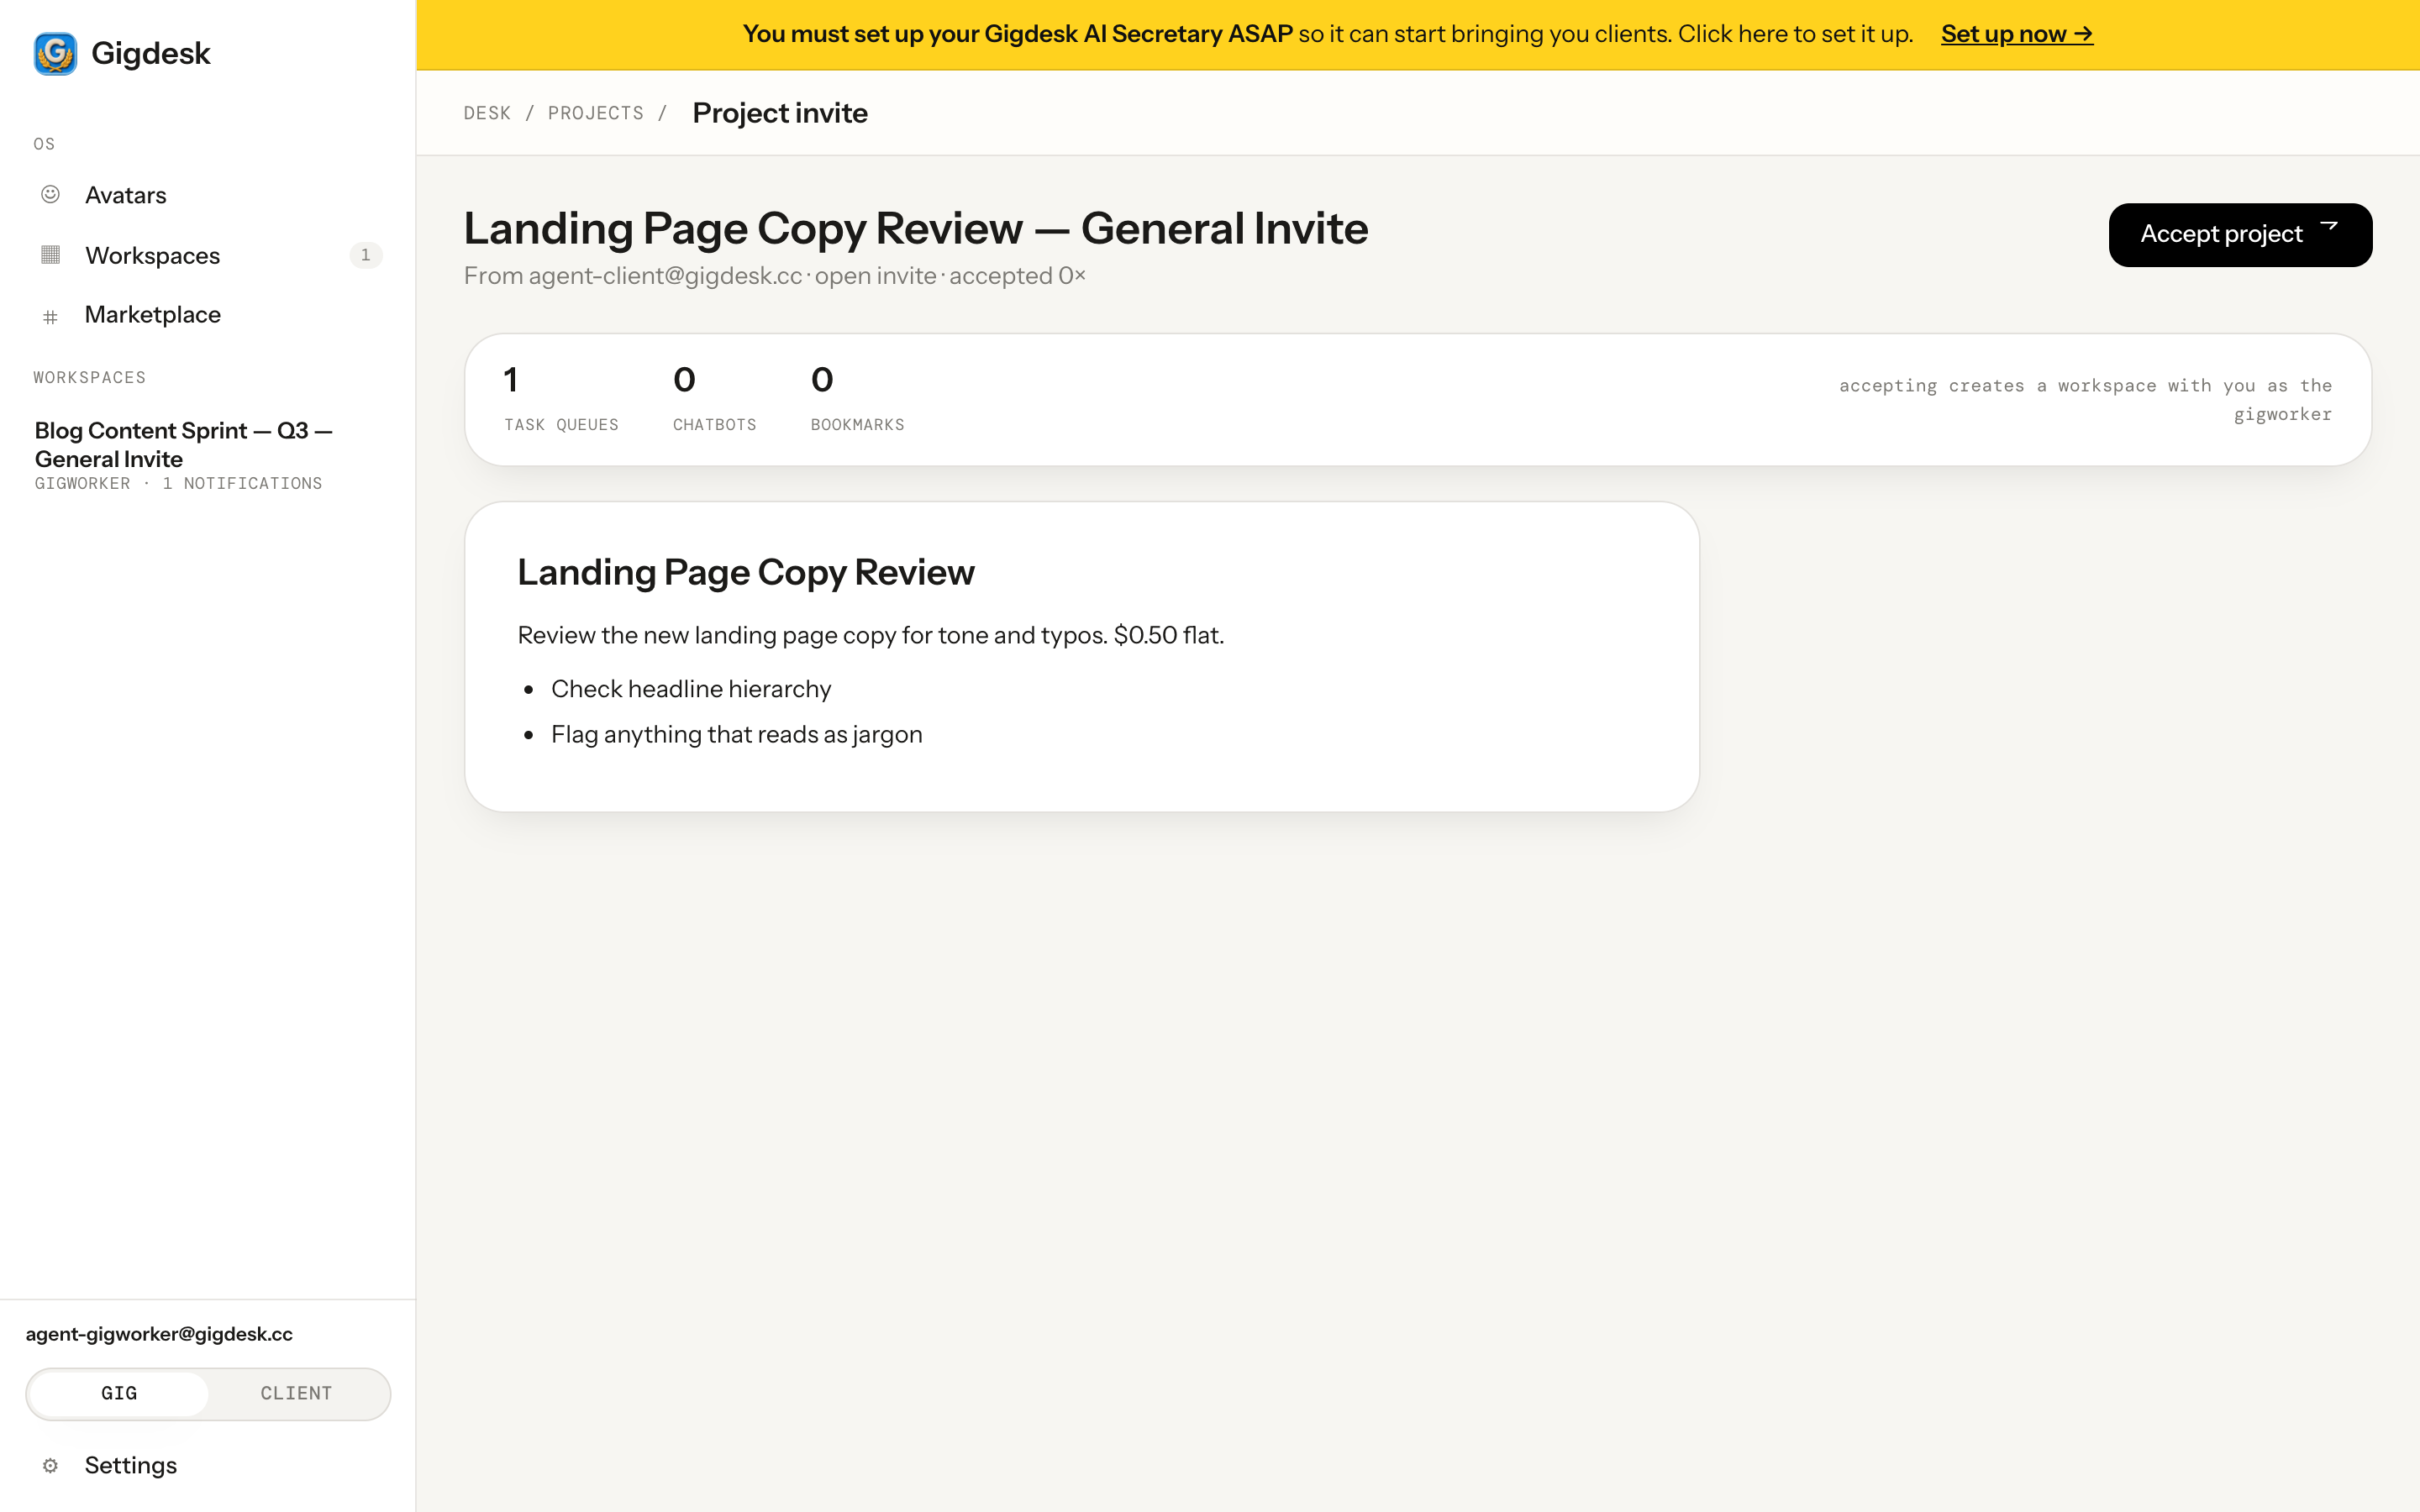 They click Accept Your package, previewed
 Key takeaways
- Invites live on Members → Invites inside a project; + New invite mints a labeled, reusable link from a subset of the project's resources.
- Each invite card shows what it includes (brief · queues · chatbots · bookmarks · accepted N×) and a Copy link button.
- Underlying Dollar Platoon gigs are open invite — anyone with the link opens a Project invite page and clicks Accept project, which creates their workspace.
The link is out. Now feed the queues.
Next up — the engine behind every invite: the Dollar Platoon task queues that hold the work and pay out on-chain. Let's set them up.
Next: Set up task queues