Create a project & package the work
Assemble a project from a brief, task queues, agents, and bookmarks — the reusable package you'll hand a gigworker.
On Gigdesk, a project is how you package work before you hand it off. It bundles a title, a brief, the Dollar Platoon task queues that pay the work out, the chatbots that answer questions, and the bookmarks a worker needs — one reusable package you'll later invite gigworkers into. Build it once, invite as many gigworkers as you like.
Switch to Client mode
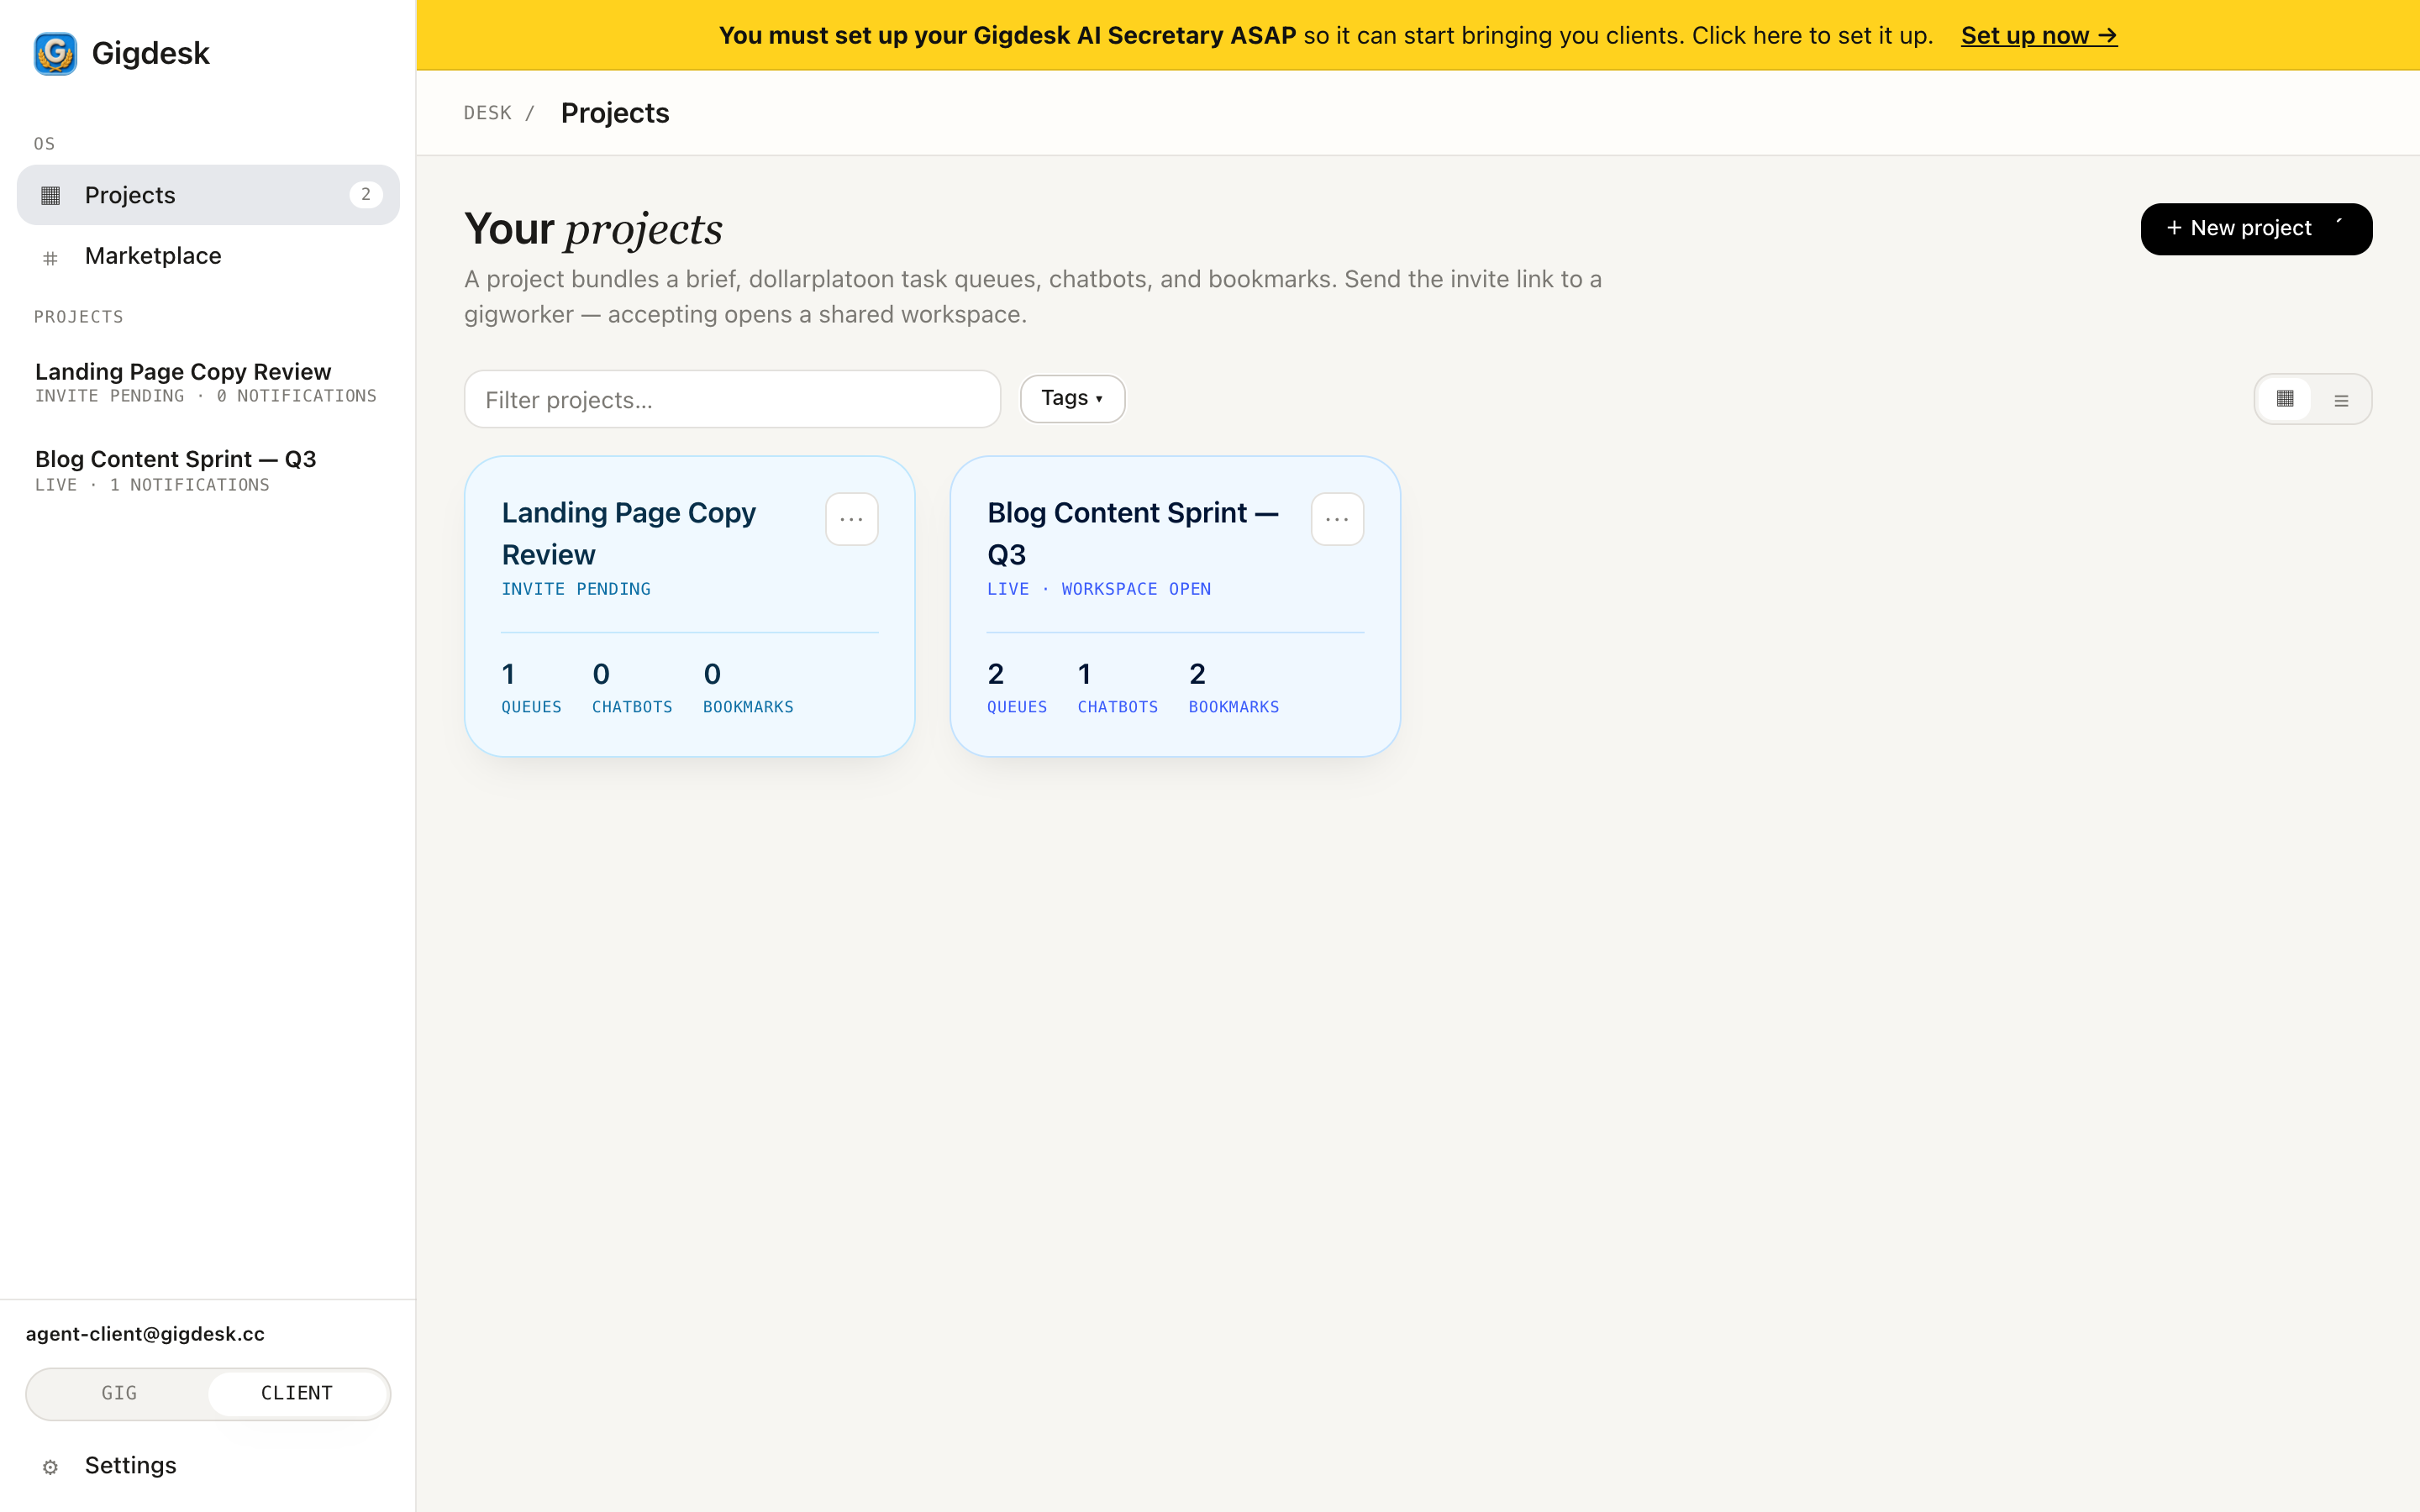
Gigdesk has two sides. At the bottom of the left sidebar, next to your email and Settings, is a GIG / CLIENT toggle. Flip it to CLIENT and the sidebar changes: the top now reads Projects and Marketplace. Projects is where the packages you build live; Marketplace is where you browse what's already out there.
- GIG mode is the gigworker side — Workspaces you've accepted invites into.
- CLIENT mode is the client side — Projects you build and invite gigworkers into.
What a project holds
The New project form is a single package built from a handful of parts. None of them are throwaway — every resource has a global master record, so anything you attach can be imported into another project just by its id.
- Project title — required; it's how the package shows up in your Projects list.
- Brief — a markdown editor with a formatting toolbar and a Preview tab, or upload a
brief.md. This is the first thing a gigworker reads. - Task queues — multi-select your Dollar Platoon gigs. Starts at "No gigs selected yet"; use Select gigs to add them or Manage gigs ↗ to open Dollar Platoon.
- Chatbots — webhook agents that answer the worker's questions. + Add chatbot; each one needs its own
instructions.md. - Bookmarks — the 3rd-party URLs (tools, sheets, style guides) a worker needs on hand.
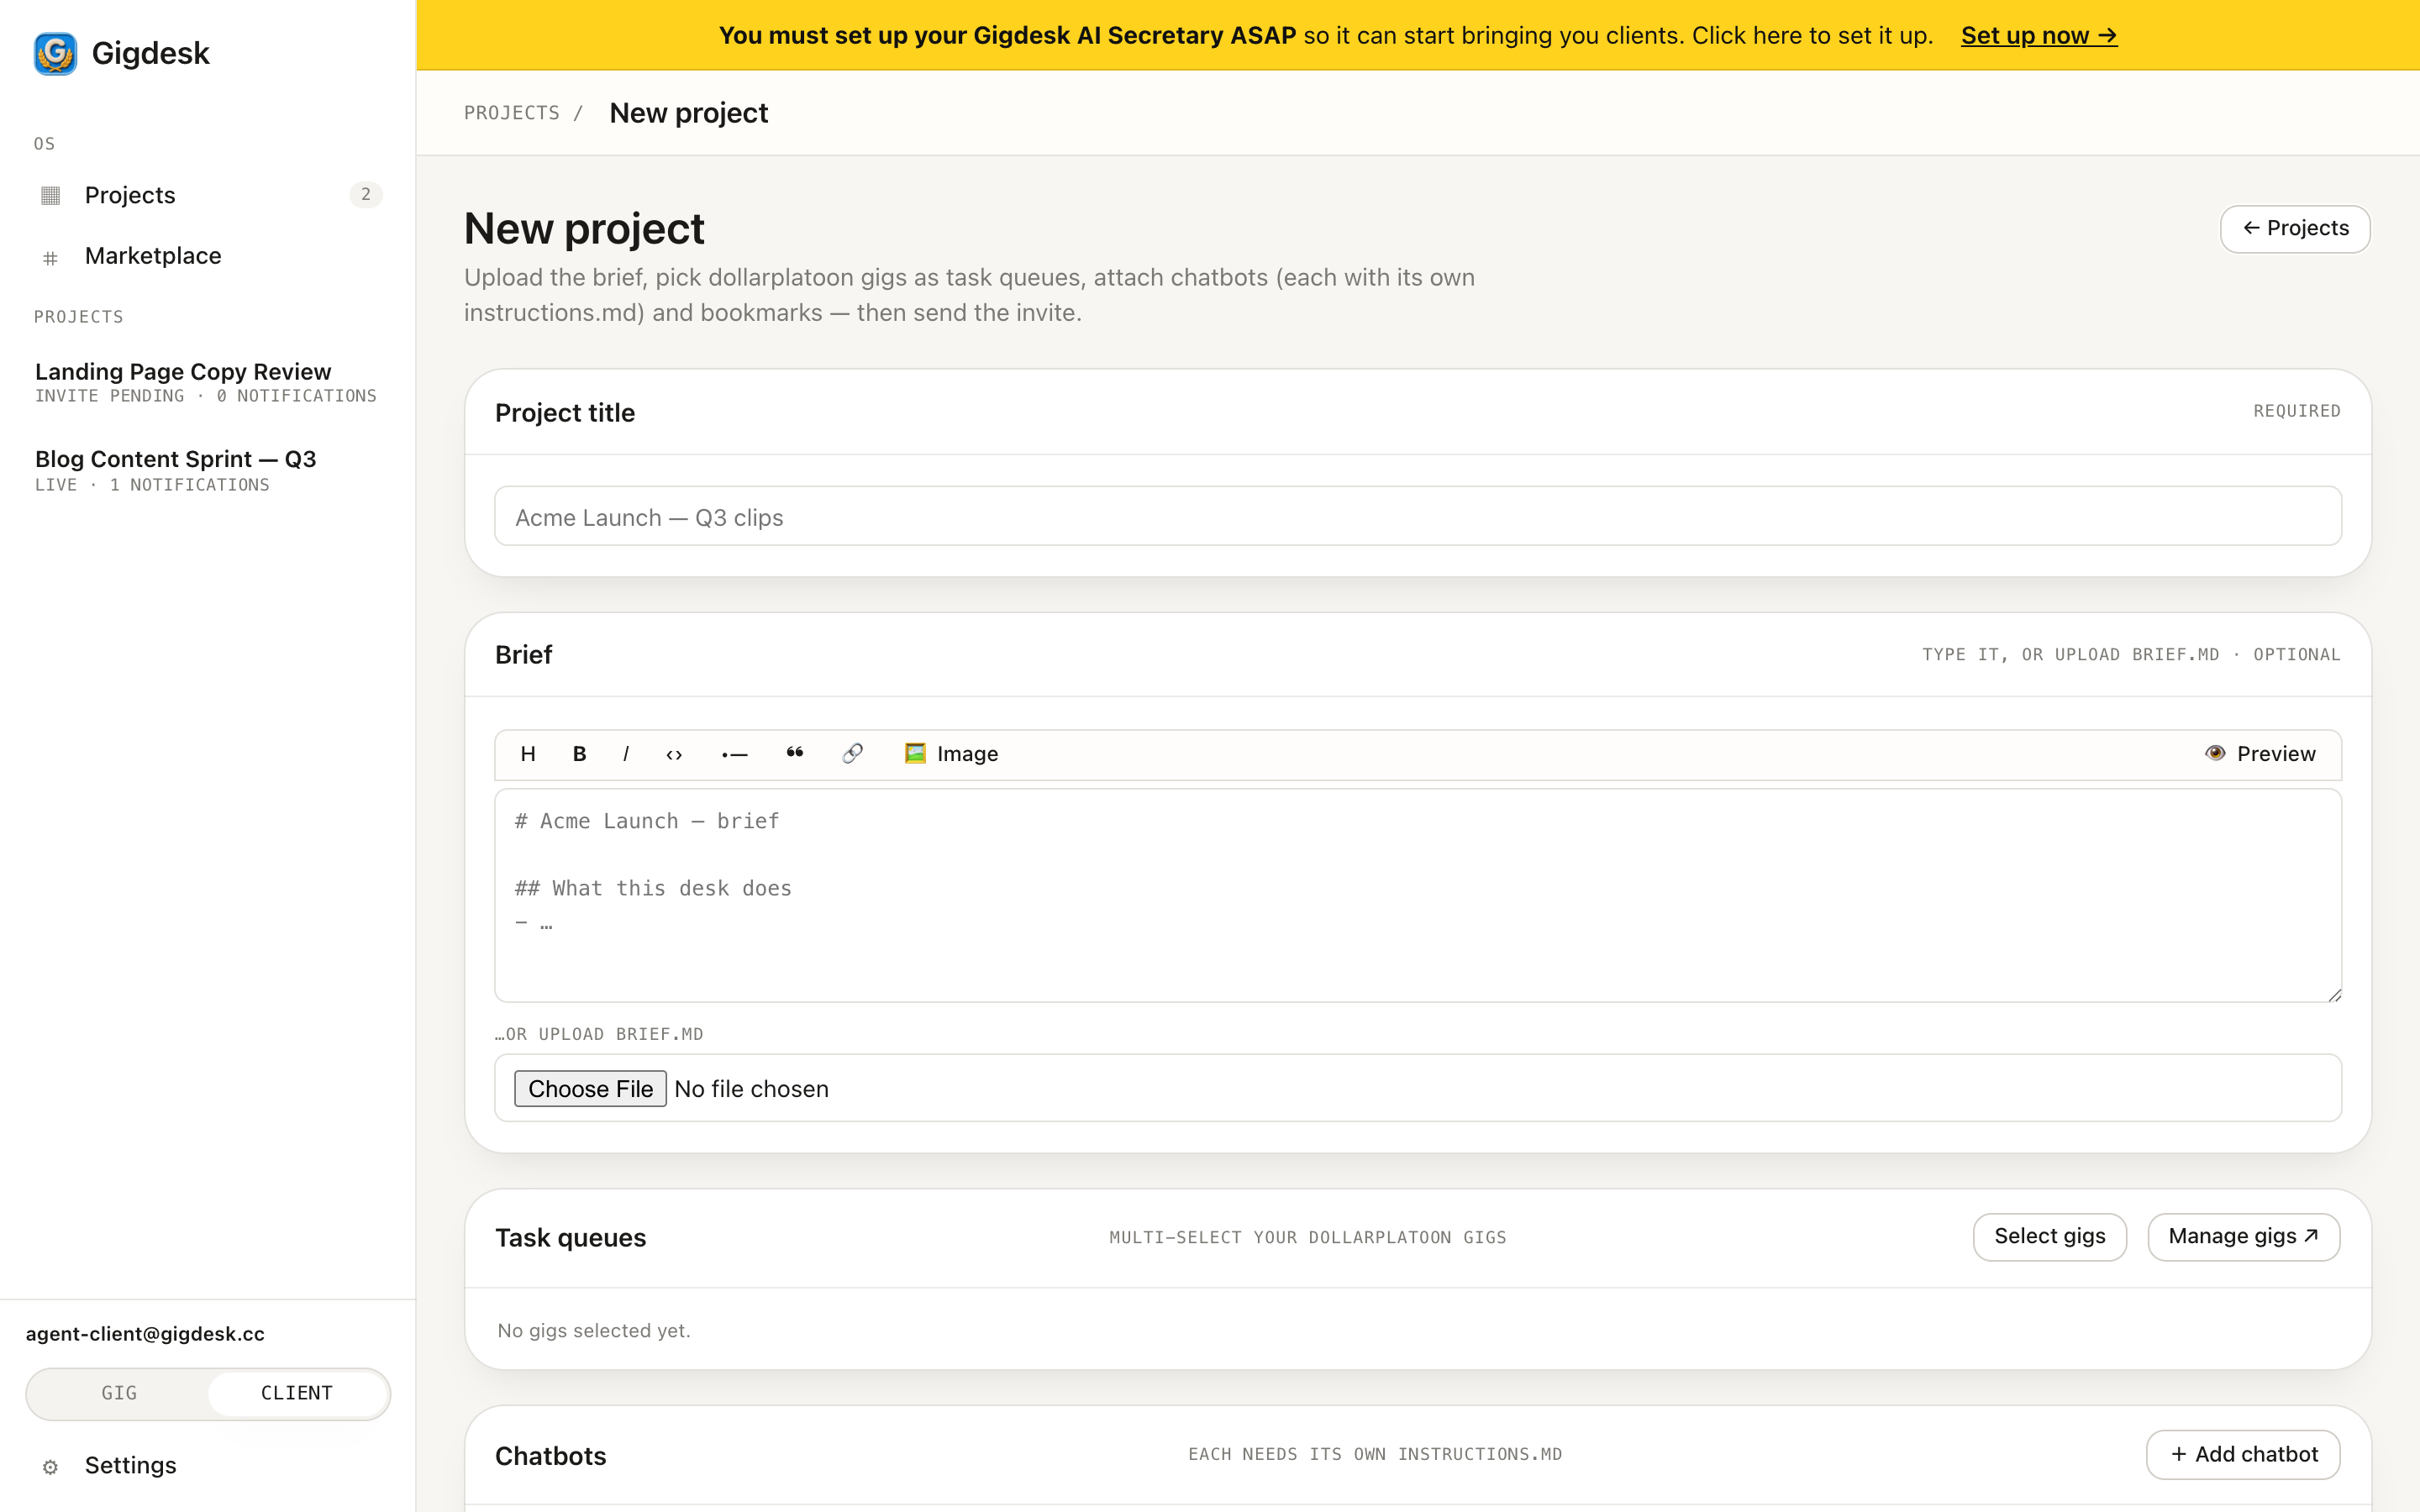 Name the project Brief — type or upload .md Pick Dollar Platoon gigs
 Build it step by step
- 1
Flip to Client mode & open New project
Set the sidebar toggle to CLIENT, open Projects, and start a New project. Give it a Project title — that field is required and names the package.
- 2
Write the brief
In the Brief editor, type your markdown using the formatting toolbar and check the Preview tab — or upload an existing
brief.md. Be concrete about what the work is, how it's judged, and what "done" looks like. - 3
Select your Dollar Platoon task queues
Under Task queues it starts on "No gigs selected yet." Hit Select gigs to multi-select the Dollar Platoon gigs that fund and distribute the paid work, or Manage gigs ↗ to jump to Dollar Platoon and set one up.
- 4
Add chatbots & bookmarks
Use + Add chatbot to attach webhook agents that answer the worker's questions — each needs its own
instructions.md. Then add the Bookmarks a worker will need. Every one of these is a global master record, so you can import an existing one by id instead of rebuilding it. - 5
Save & send the invite
Save the project and it lands in your Projects list as a reusable package. From there you send the invite — the next chapter — which is what actually creates a gigworker's workspace.
Key takeaways
- Flip the sidebar's GIG / CLIENT toggle to CLIENT to get Projects and Marketplace, then start a New project.
- A project packages a title, a markdown brief, Dollar Platoon gigs as task queues, chatbots, and bookmarks into one reusable object.
- Every resource has a global master record, so anything can be attached — or imported into another project — by its id.
Package built. Now hand it off.
Next up: send a labeled invite from this project and share the link — accepting it spins up the gigworker's workspace.
Next: Invite a gigworker