Connect your AI secretary
The first thing to set up after you join: connect your personal Gmail so an AI secretary can triage the inbox, draft replies for your approval, and flag hot leads — all revocable with one token.
The first thing to set up after you join Gigdesk is your inbox. Connect an email account and it becomes a gateway your desk can read and reply through — a personal AI secretary that triages what lands, drafts replies for you to approve, and flags the hot leads. This chapter walks you from the Email gateways page to a live, connected inbox.
Where the secretary lives
Your secretary isn't a separate app — it's an email account you connect on the Email gateways page, under Settings → Email Gateways. Connect as many accounts as you like; each one becomes its own gateway with scoped tokens and filters you manage, and revoke, per account. Gateways live outside workspaces, so the same inbox can serve every desk you run.
- One inbox = one gateway. Each connected account is a pure REST endpoint the rest of your desk composes with — open it any time to manage its tokens and filters.
- You stay in control. Access is scoped and revocable per account, so you can pull a gateway offline without touching the others.
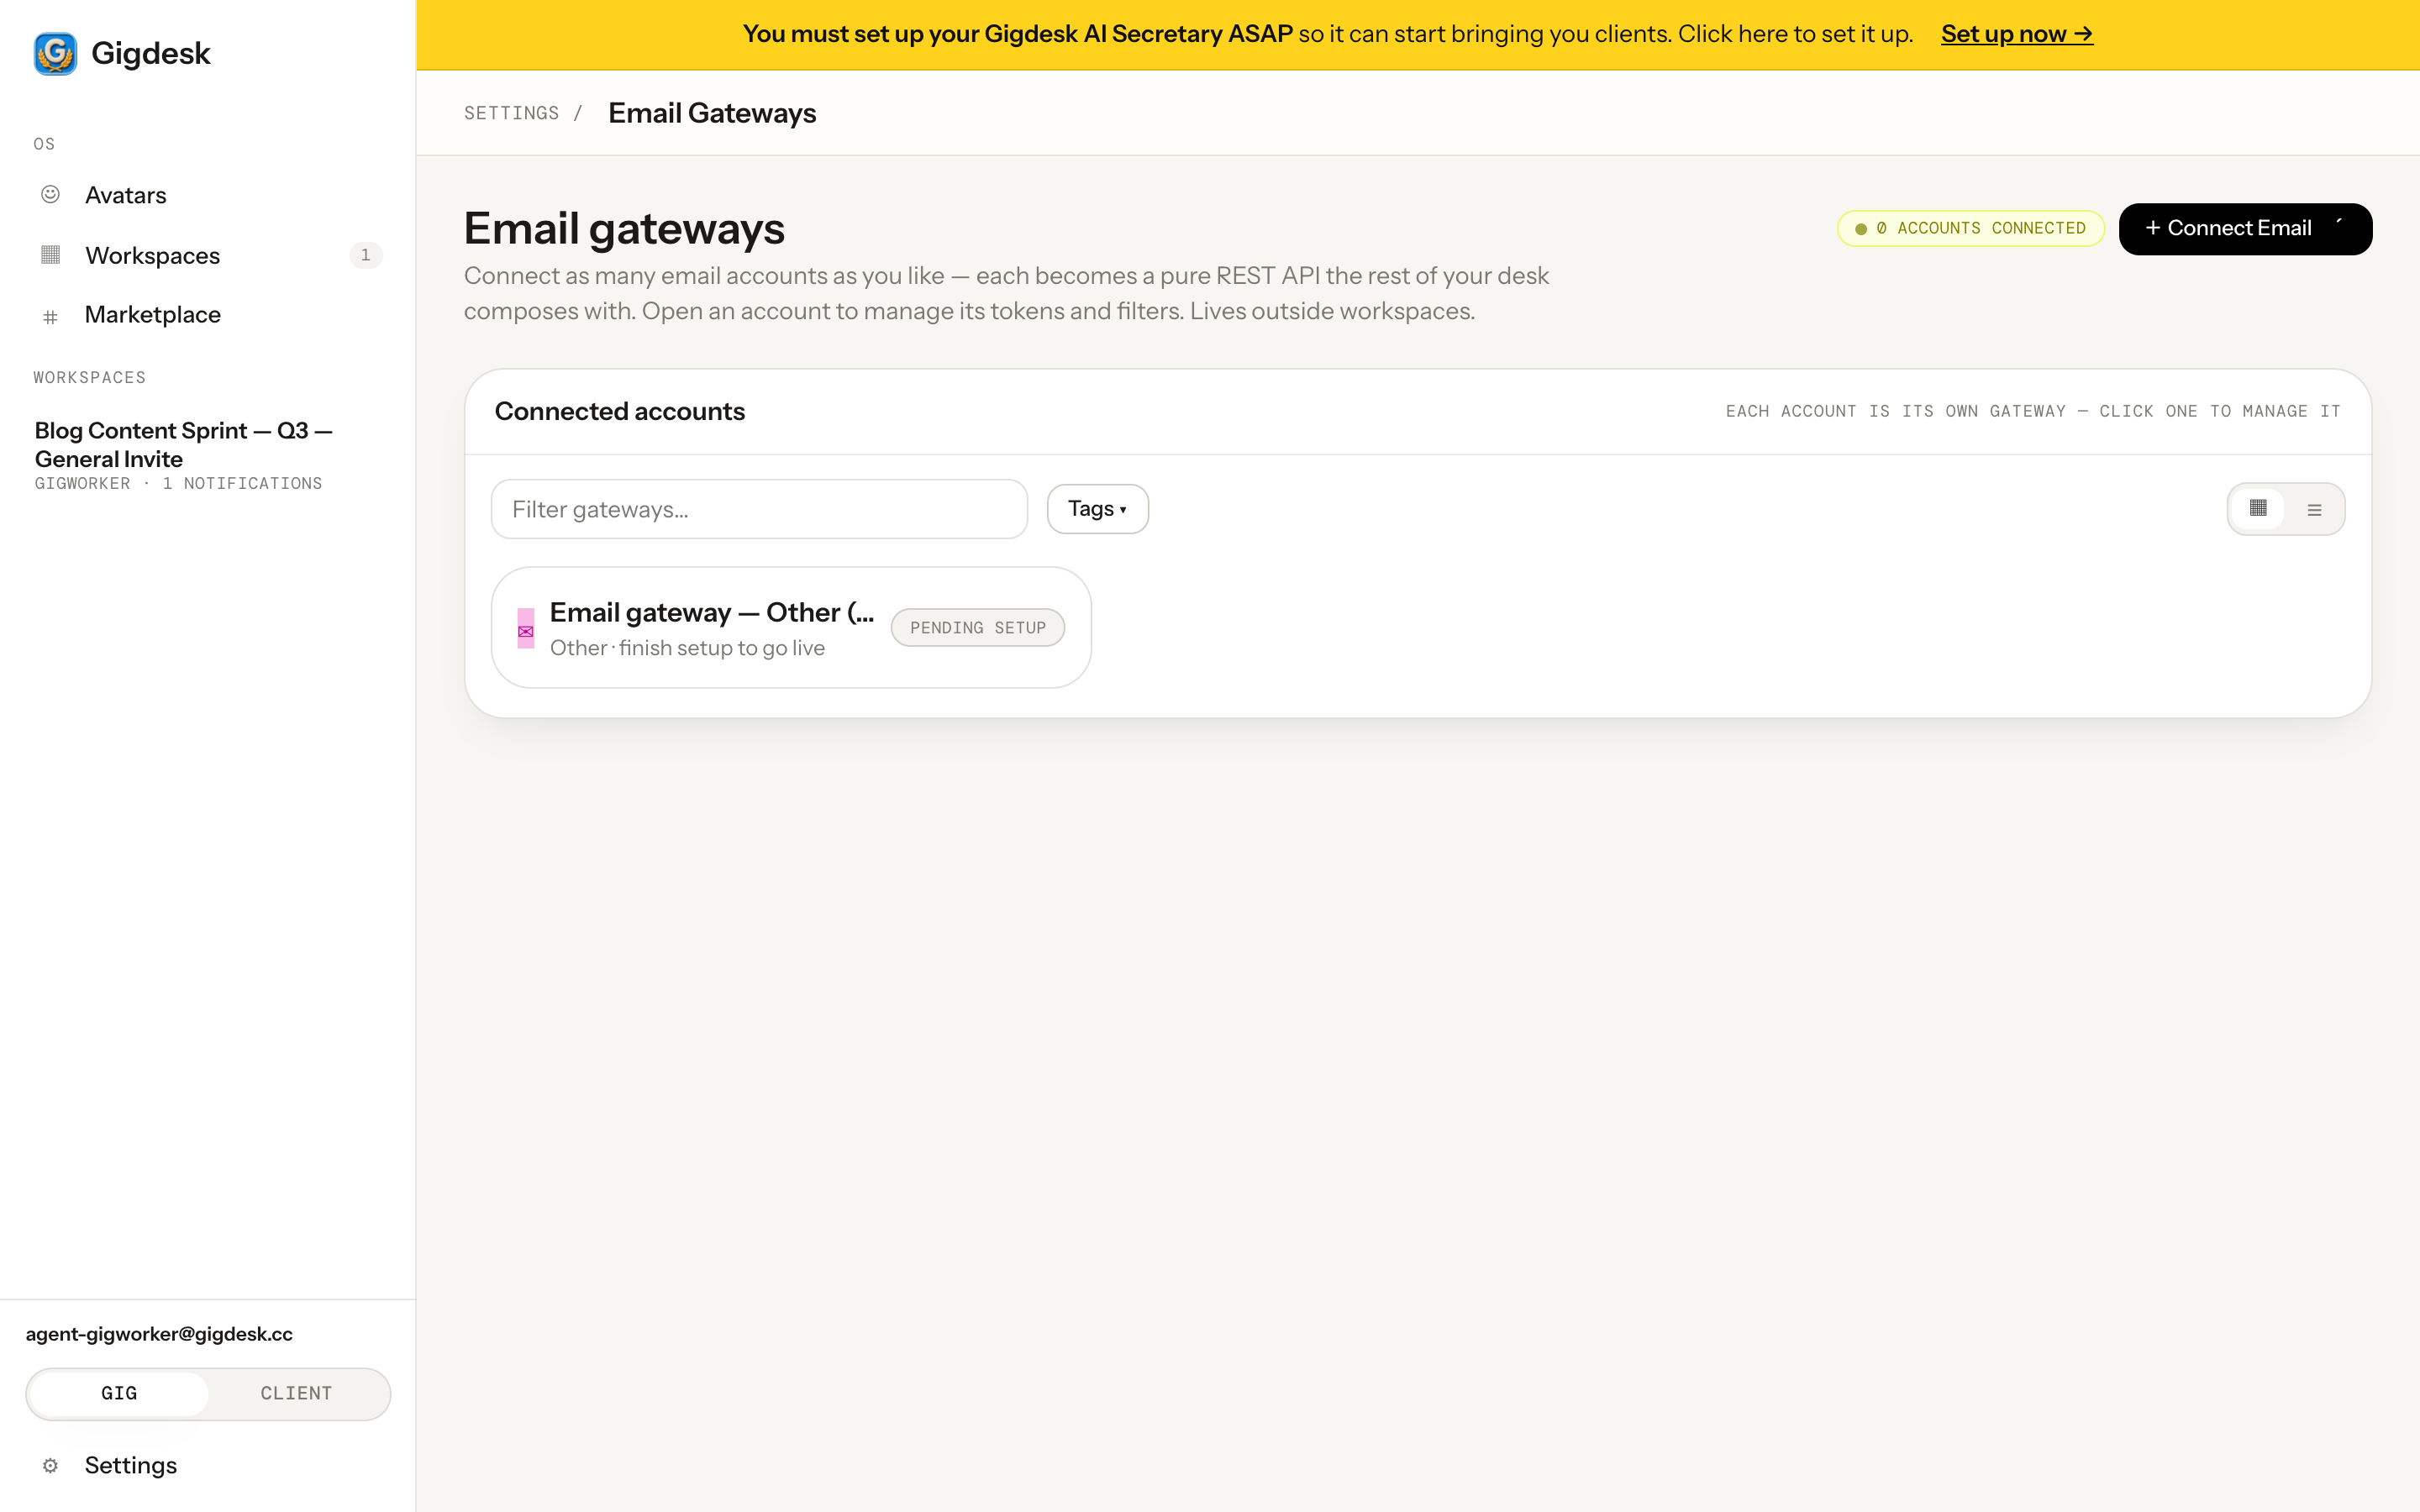 Connect an inbox Each inbox = its own gateway
 Picking a provider
Hit + Connect Email and a modal lists the providers. Gmail (Google OAuth · read + send), Outlook, and Resend are all marked Coming soon — Gmail's OAuth path is rolling out. The live option today is Other (Webhook · Zapier-style), which reads Set up: point any integration at the webhook and your inbox is connected. However you connect, the result is the same — a scoped, revocable gateway.
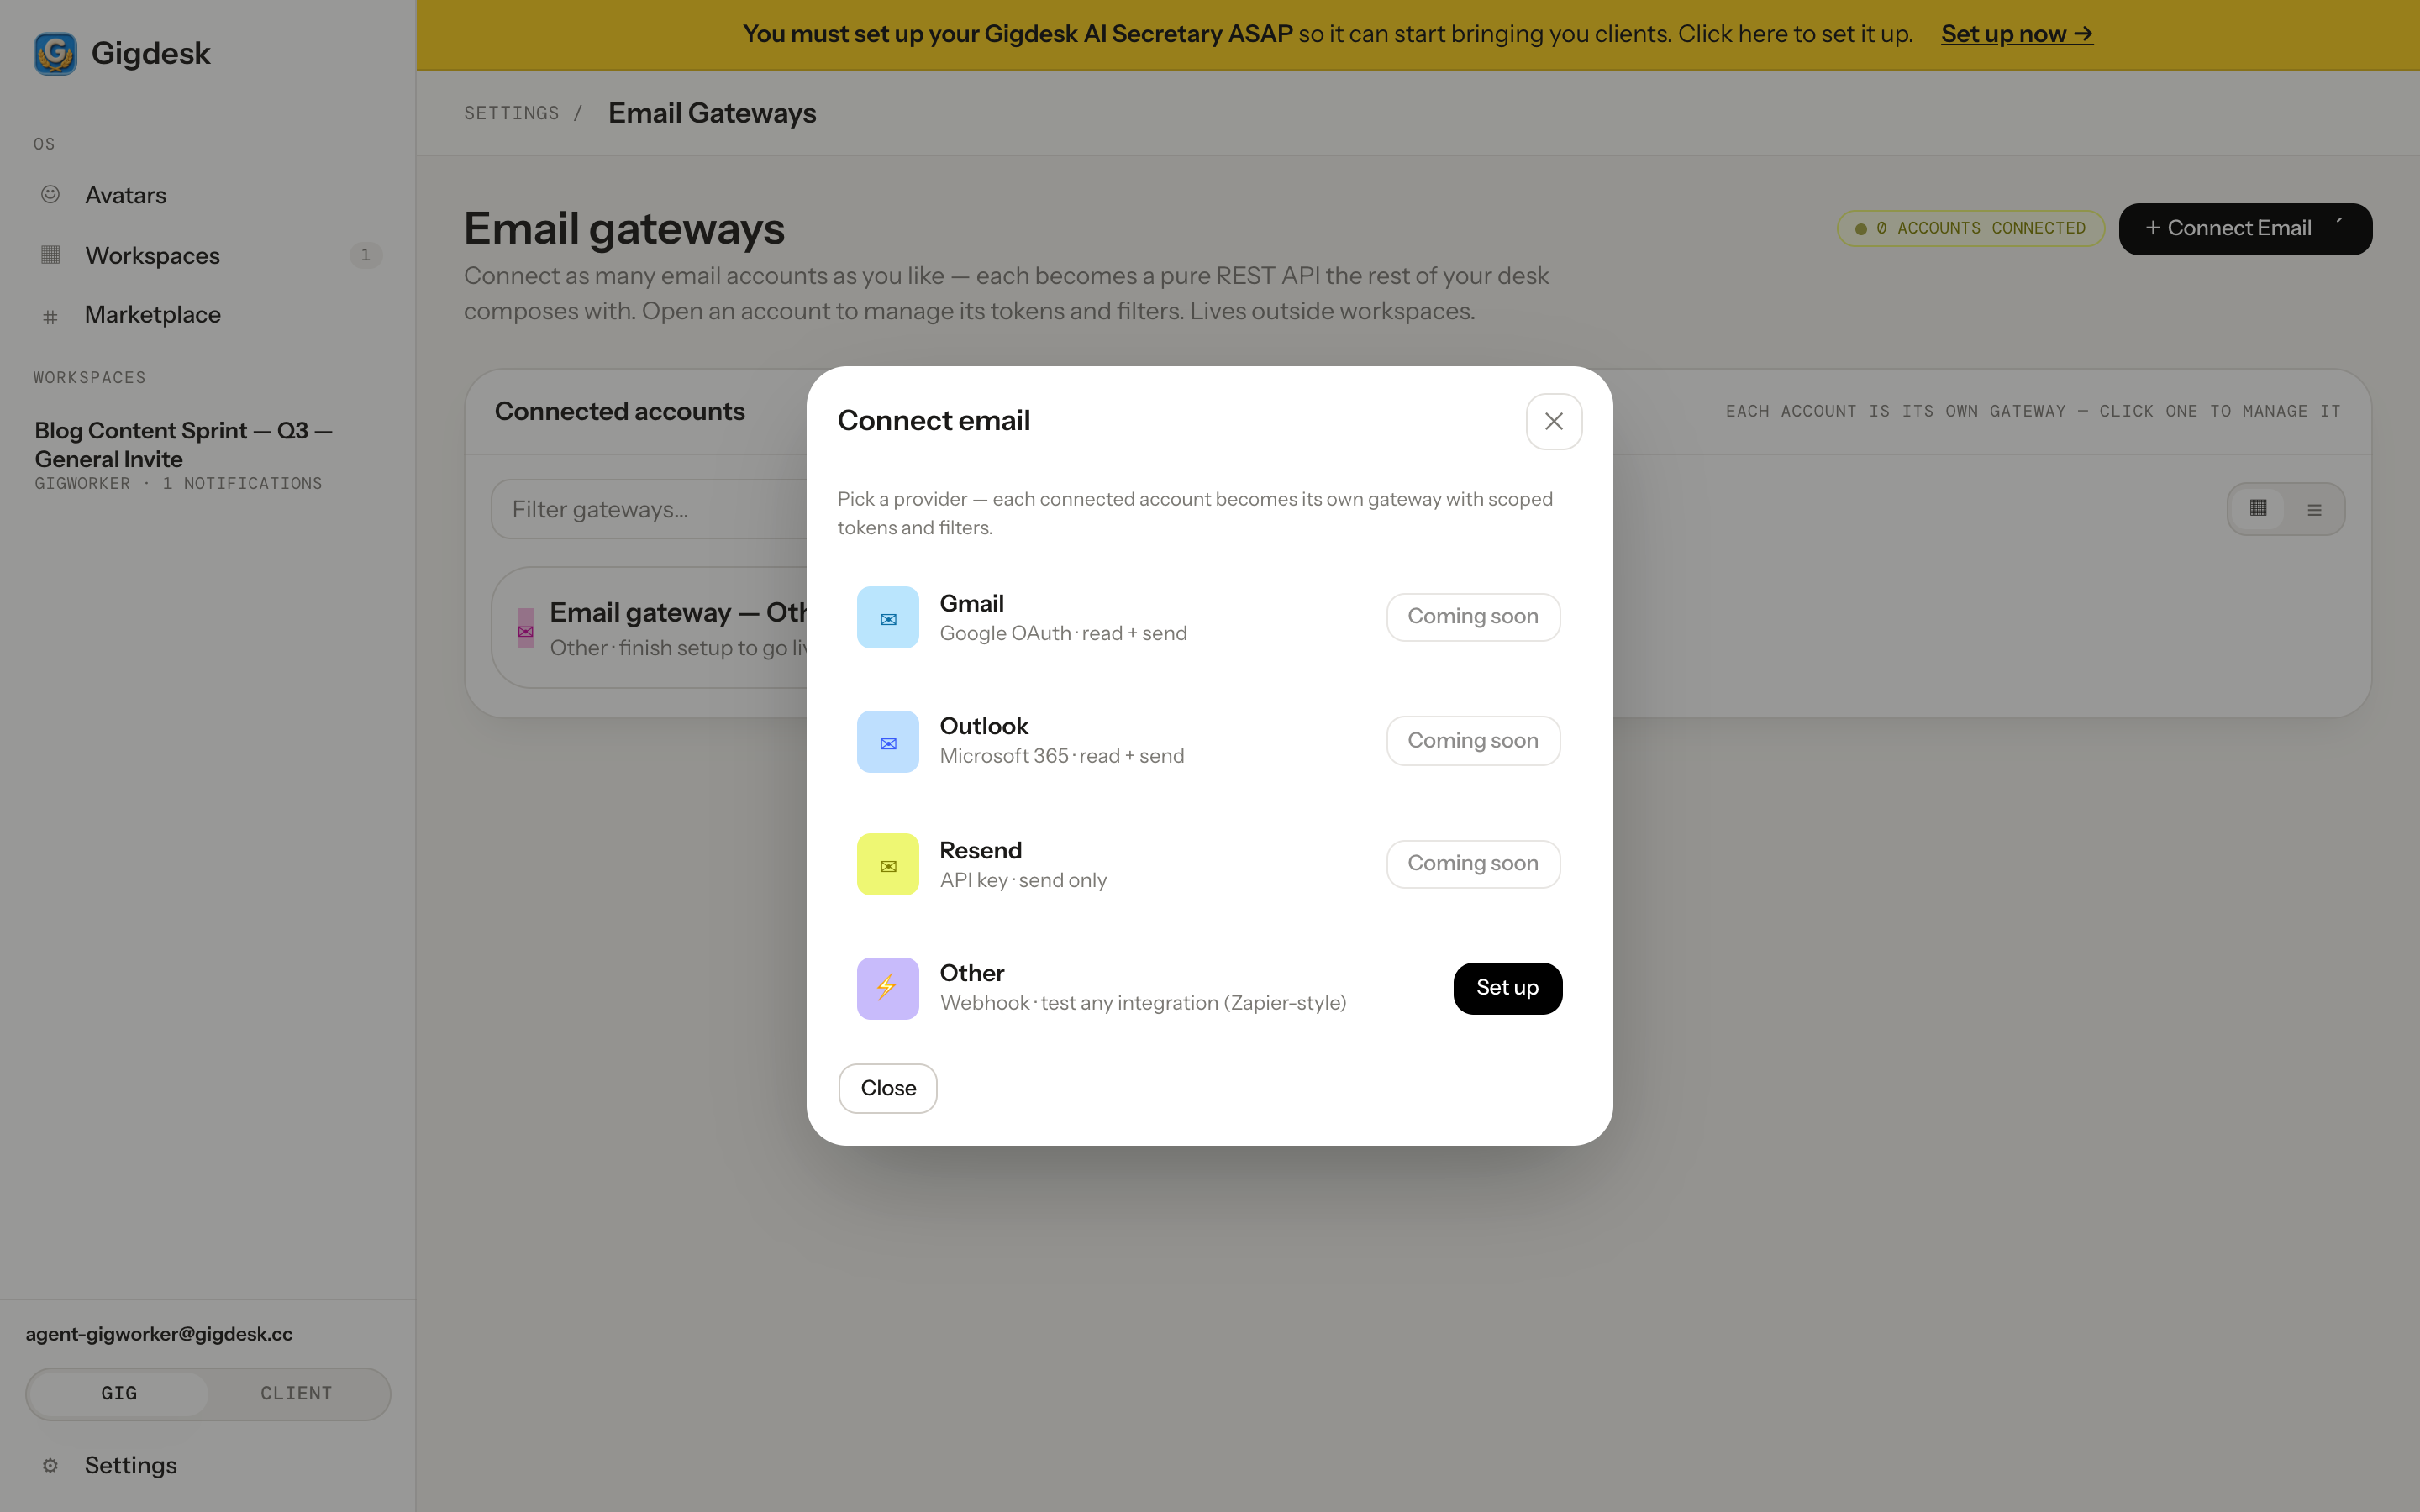 Gmail — rolling out Scoped, revocable per account
 Step by step
- 1
Open Settings → Email Gateways
From the sidebar, go to Settings, then Email Gateways. You'll see your connected accounts, each as its own gateway card.
- 2
Hit + Connect Email
Click + Connect Email to open the provider modal. Gmail, Outlook, and Resend are marked Coming soon; Other (Webhook) is the one you can set up today.
- 3
Connect via the webhook path
Choose Other (Webhook · Zapier-style) and hit Set up. Point your integration at the webhook and the inbox comes online as a new gateway.
- 4
Manage its tokens and filters
Open the gateway card to review its scoped tokens and filters. This is where you tune what the secretary can touch — and where you revoke access if you ever need to.
Key takeaways
- Your AI secretary is an inbox you connect on the Email gateways page — Settings → Email Gateways — not a separate app.
- Gmail, Outlook, and Resend are Coming soon; today you connect through the Other (Webhook) path, and Gmail's OAuth is rolling out.
- Every connected inbox is its own gateway with scoped, revocable tokens and filters, and it works as a personal 1:1 assistant — triage, approved drafts, hot-lead flags — never bulk or outbound.
Inbox connected. Now build your desk.
With a gateway live, you're ready to set up the workspace itself — its briefs, task queues, chatbots, and notifications — and actually run the job.
Next: Run your workspace